Coastal Southern Living Room Makeover: Before & After Reveal

I’m a big fan of James Farmer, an interior designer based in Perry, Georgia. I recently picked up one of his beautiful books, Arriving Home, from one of my favorite local home decor shops in Savannah, Proper English. Reading the book and browsing the gorgeous photography inspired me to make a few changes to my own living room. It was in desperate need of elevating and I couldn’t wait to get rid of the old TV stand and outdated 42-inch Samsung TV that had been occupying valuable floor space since we moved in.

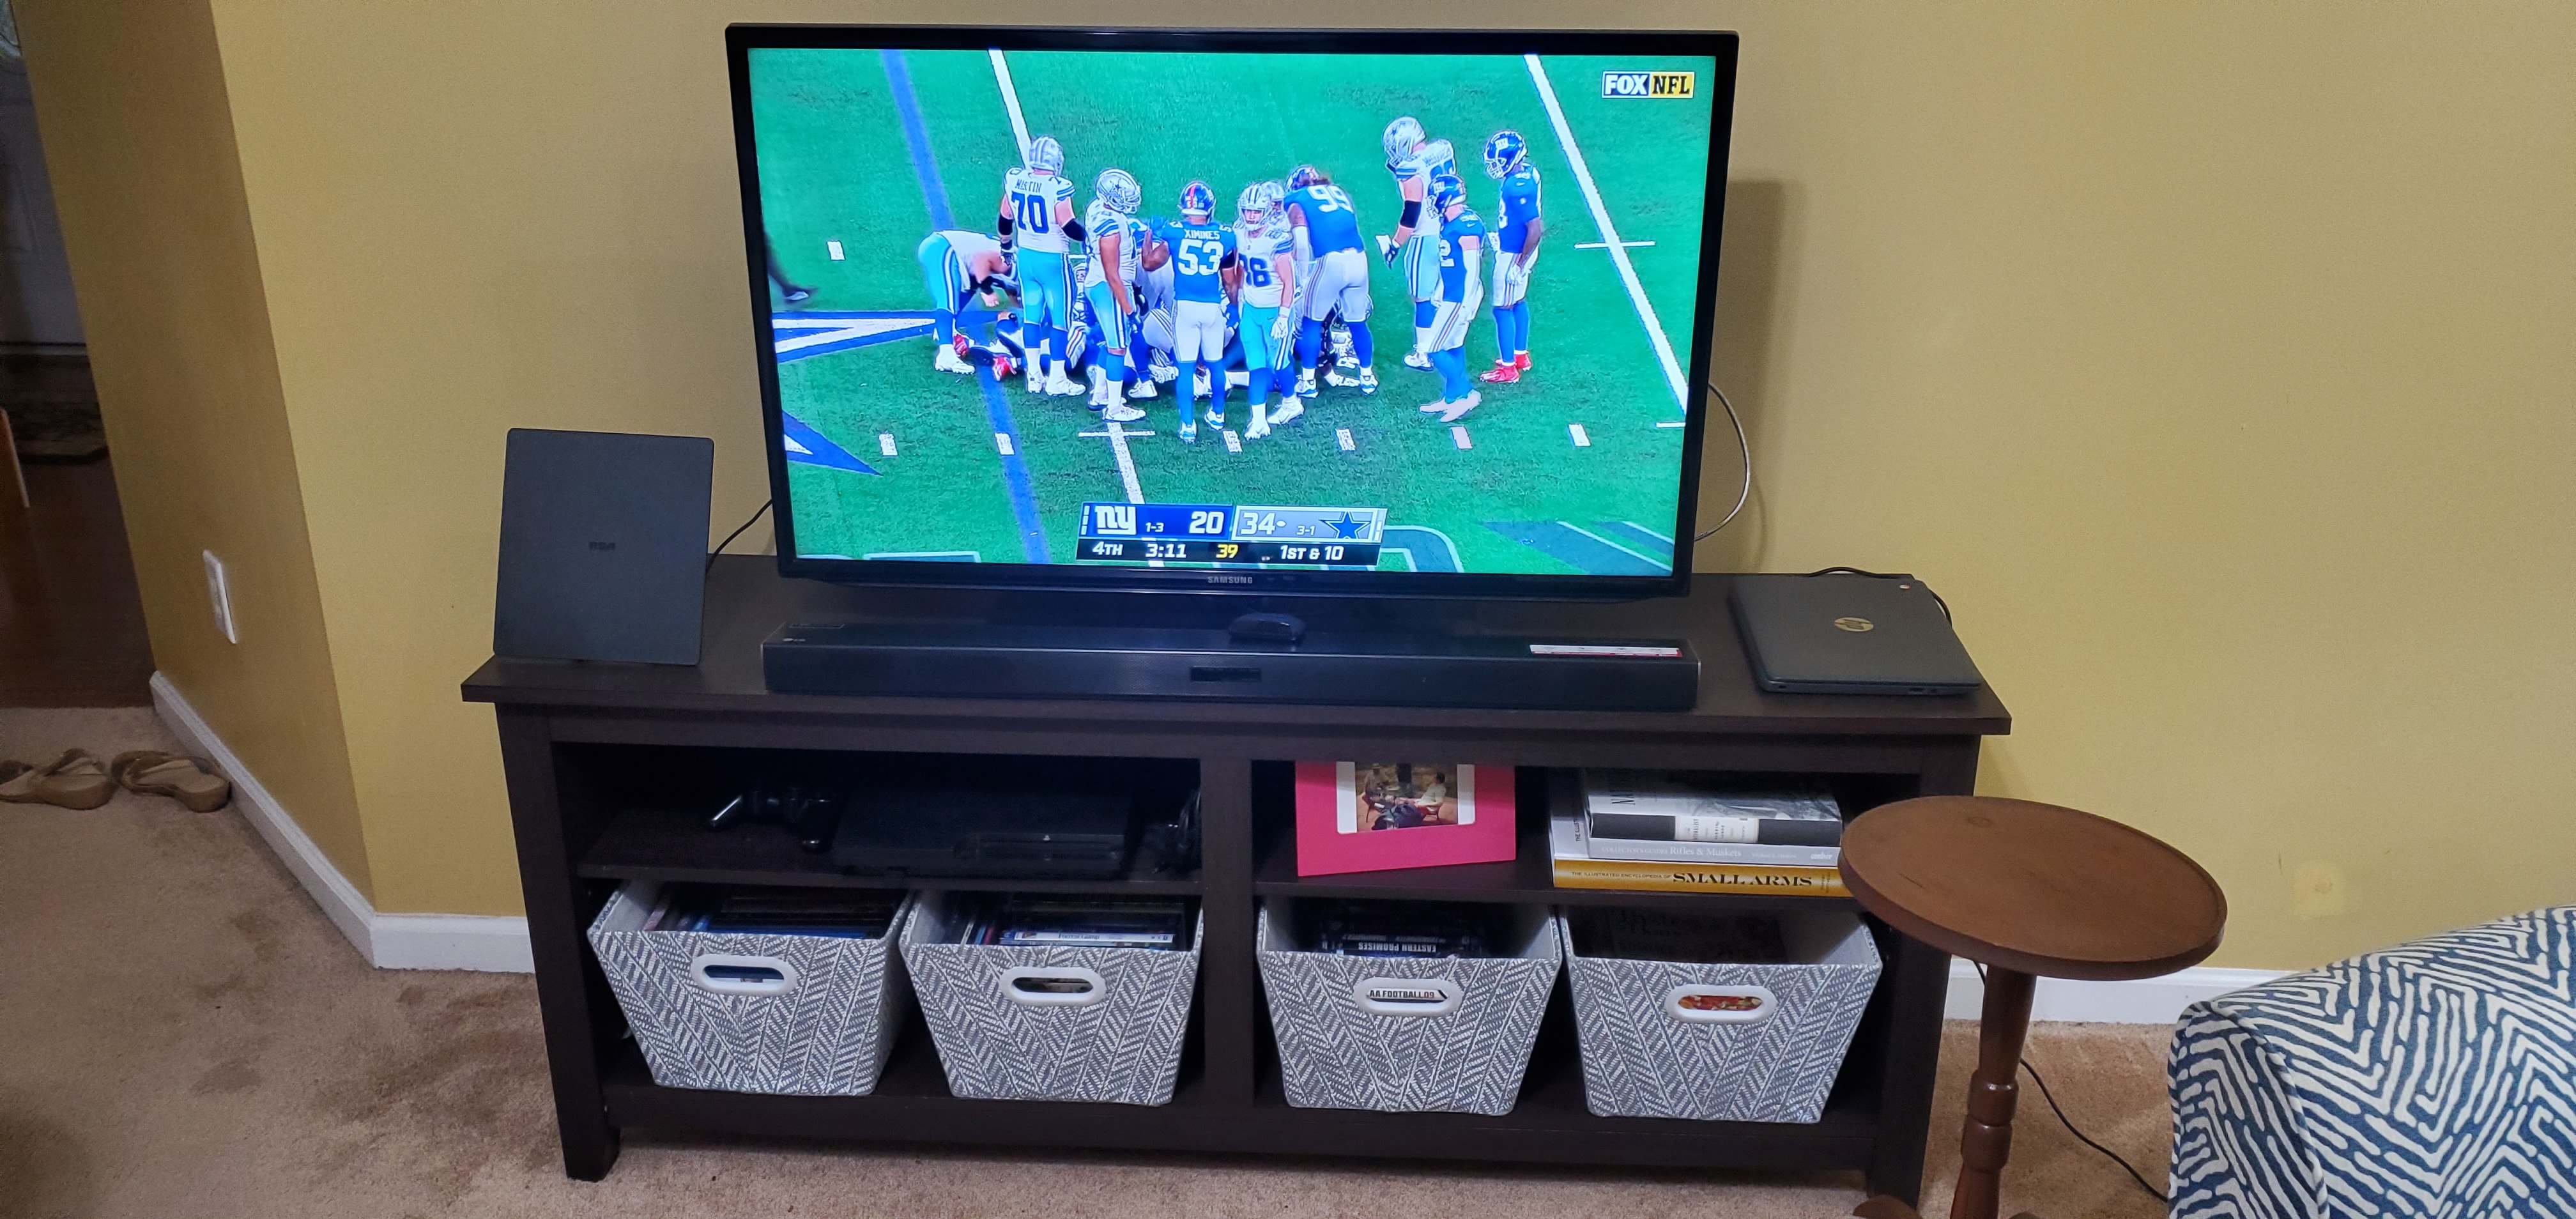
While cozy, the living room before lacked ample seating, layering and updated technology.
Before the makeover, this TV stand took up valuable floor space and lacked elegance.

My husband recently had knee surgery on a torn meniscus and “gnarly cyst” as the doctor put it, which meant several weeks in recovery at home. It was a very productive few weeks on the I-want-to-do-that-but-never-have-the-time list. He got ceiling fans installed in all of our guest rooms where previous light fixtures had been, installed a mini-split in the garage, which means it is now temperature controlled, and most importantly got a brand new 65-inch smart TV installed above the fireplace!

It’s funny how doing just one little thing can inspire action in other areas. I had been waiting to reclaim this floor space for many months, so once it was free, I got to work. The thing is, my budget was minimal, and I wanted to use things I already had from other areas of the house.
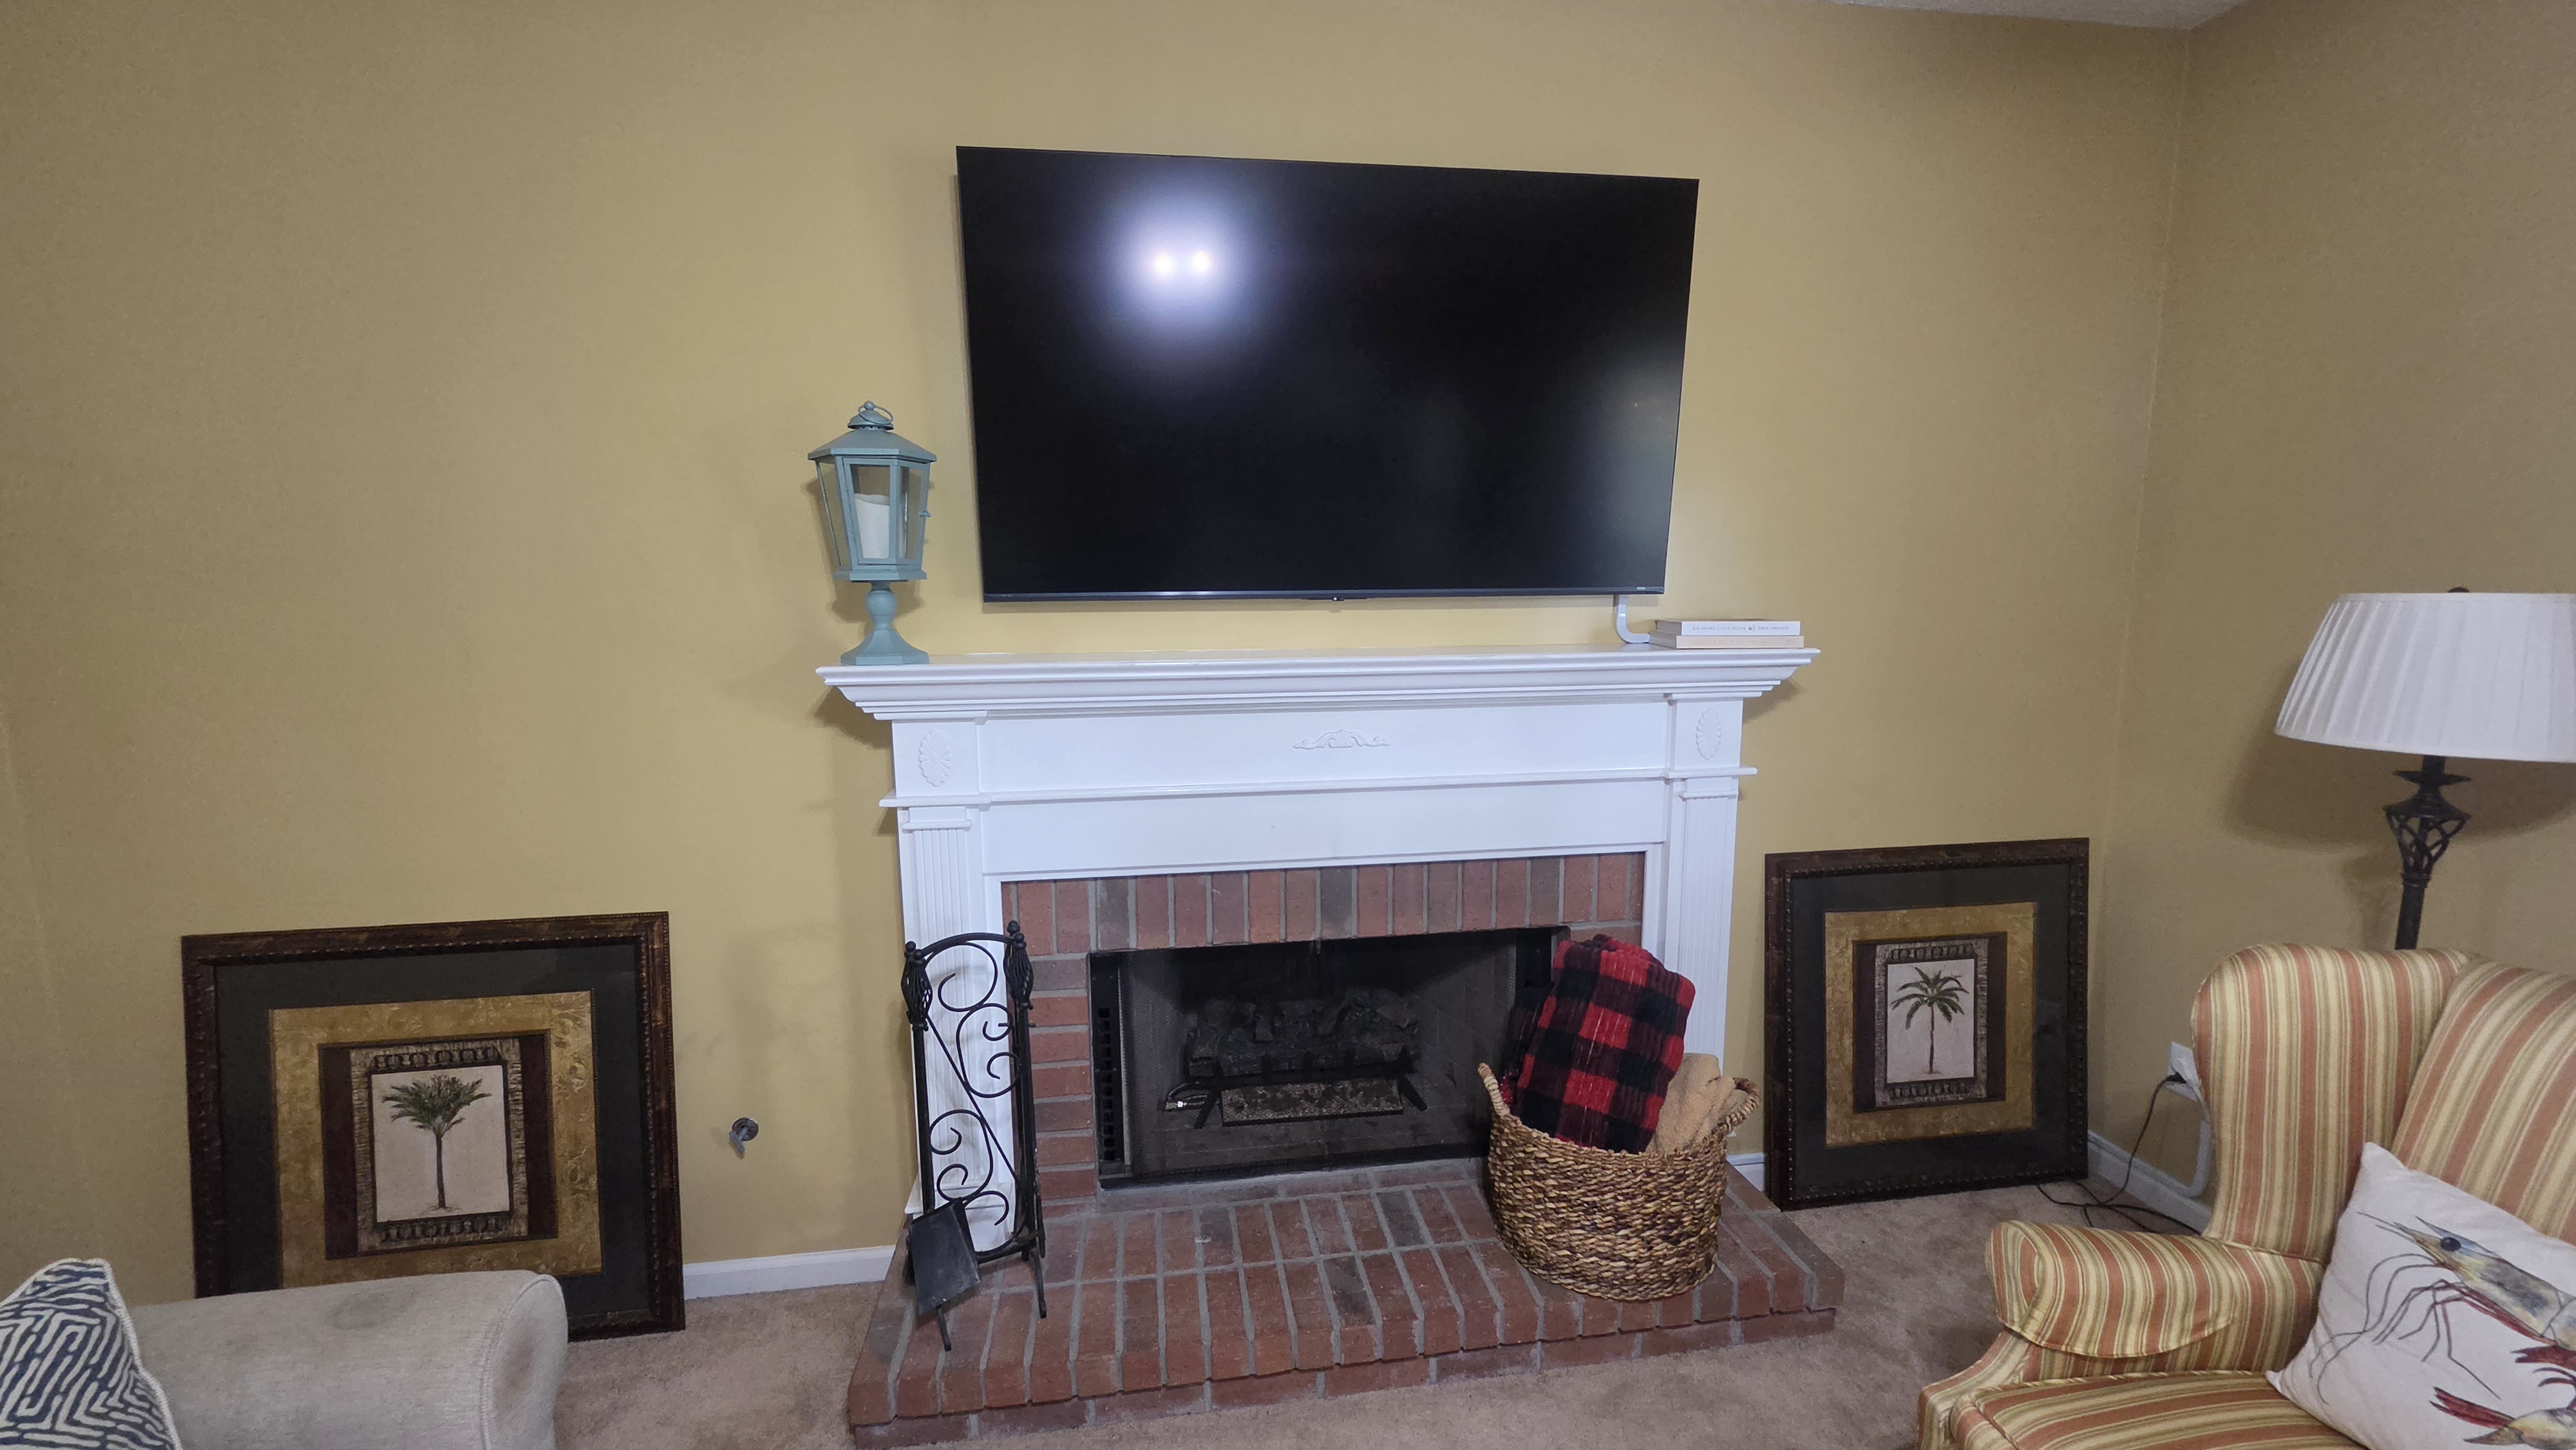
A new 65-in TV mounted above the mantel provides a more exciting viewing experience and singular focal point.

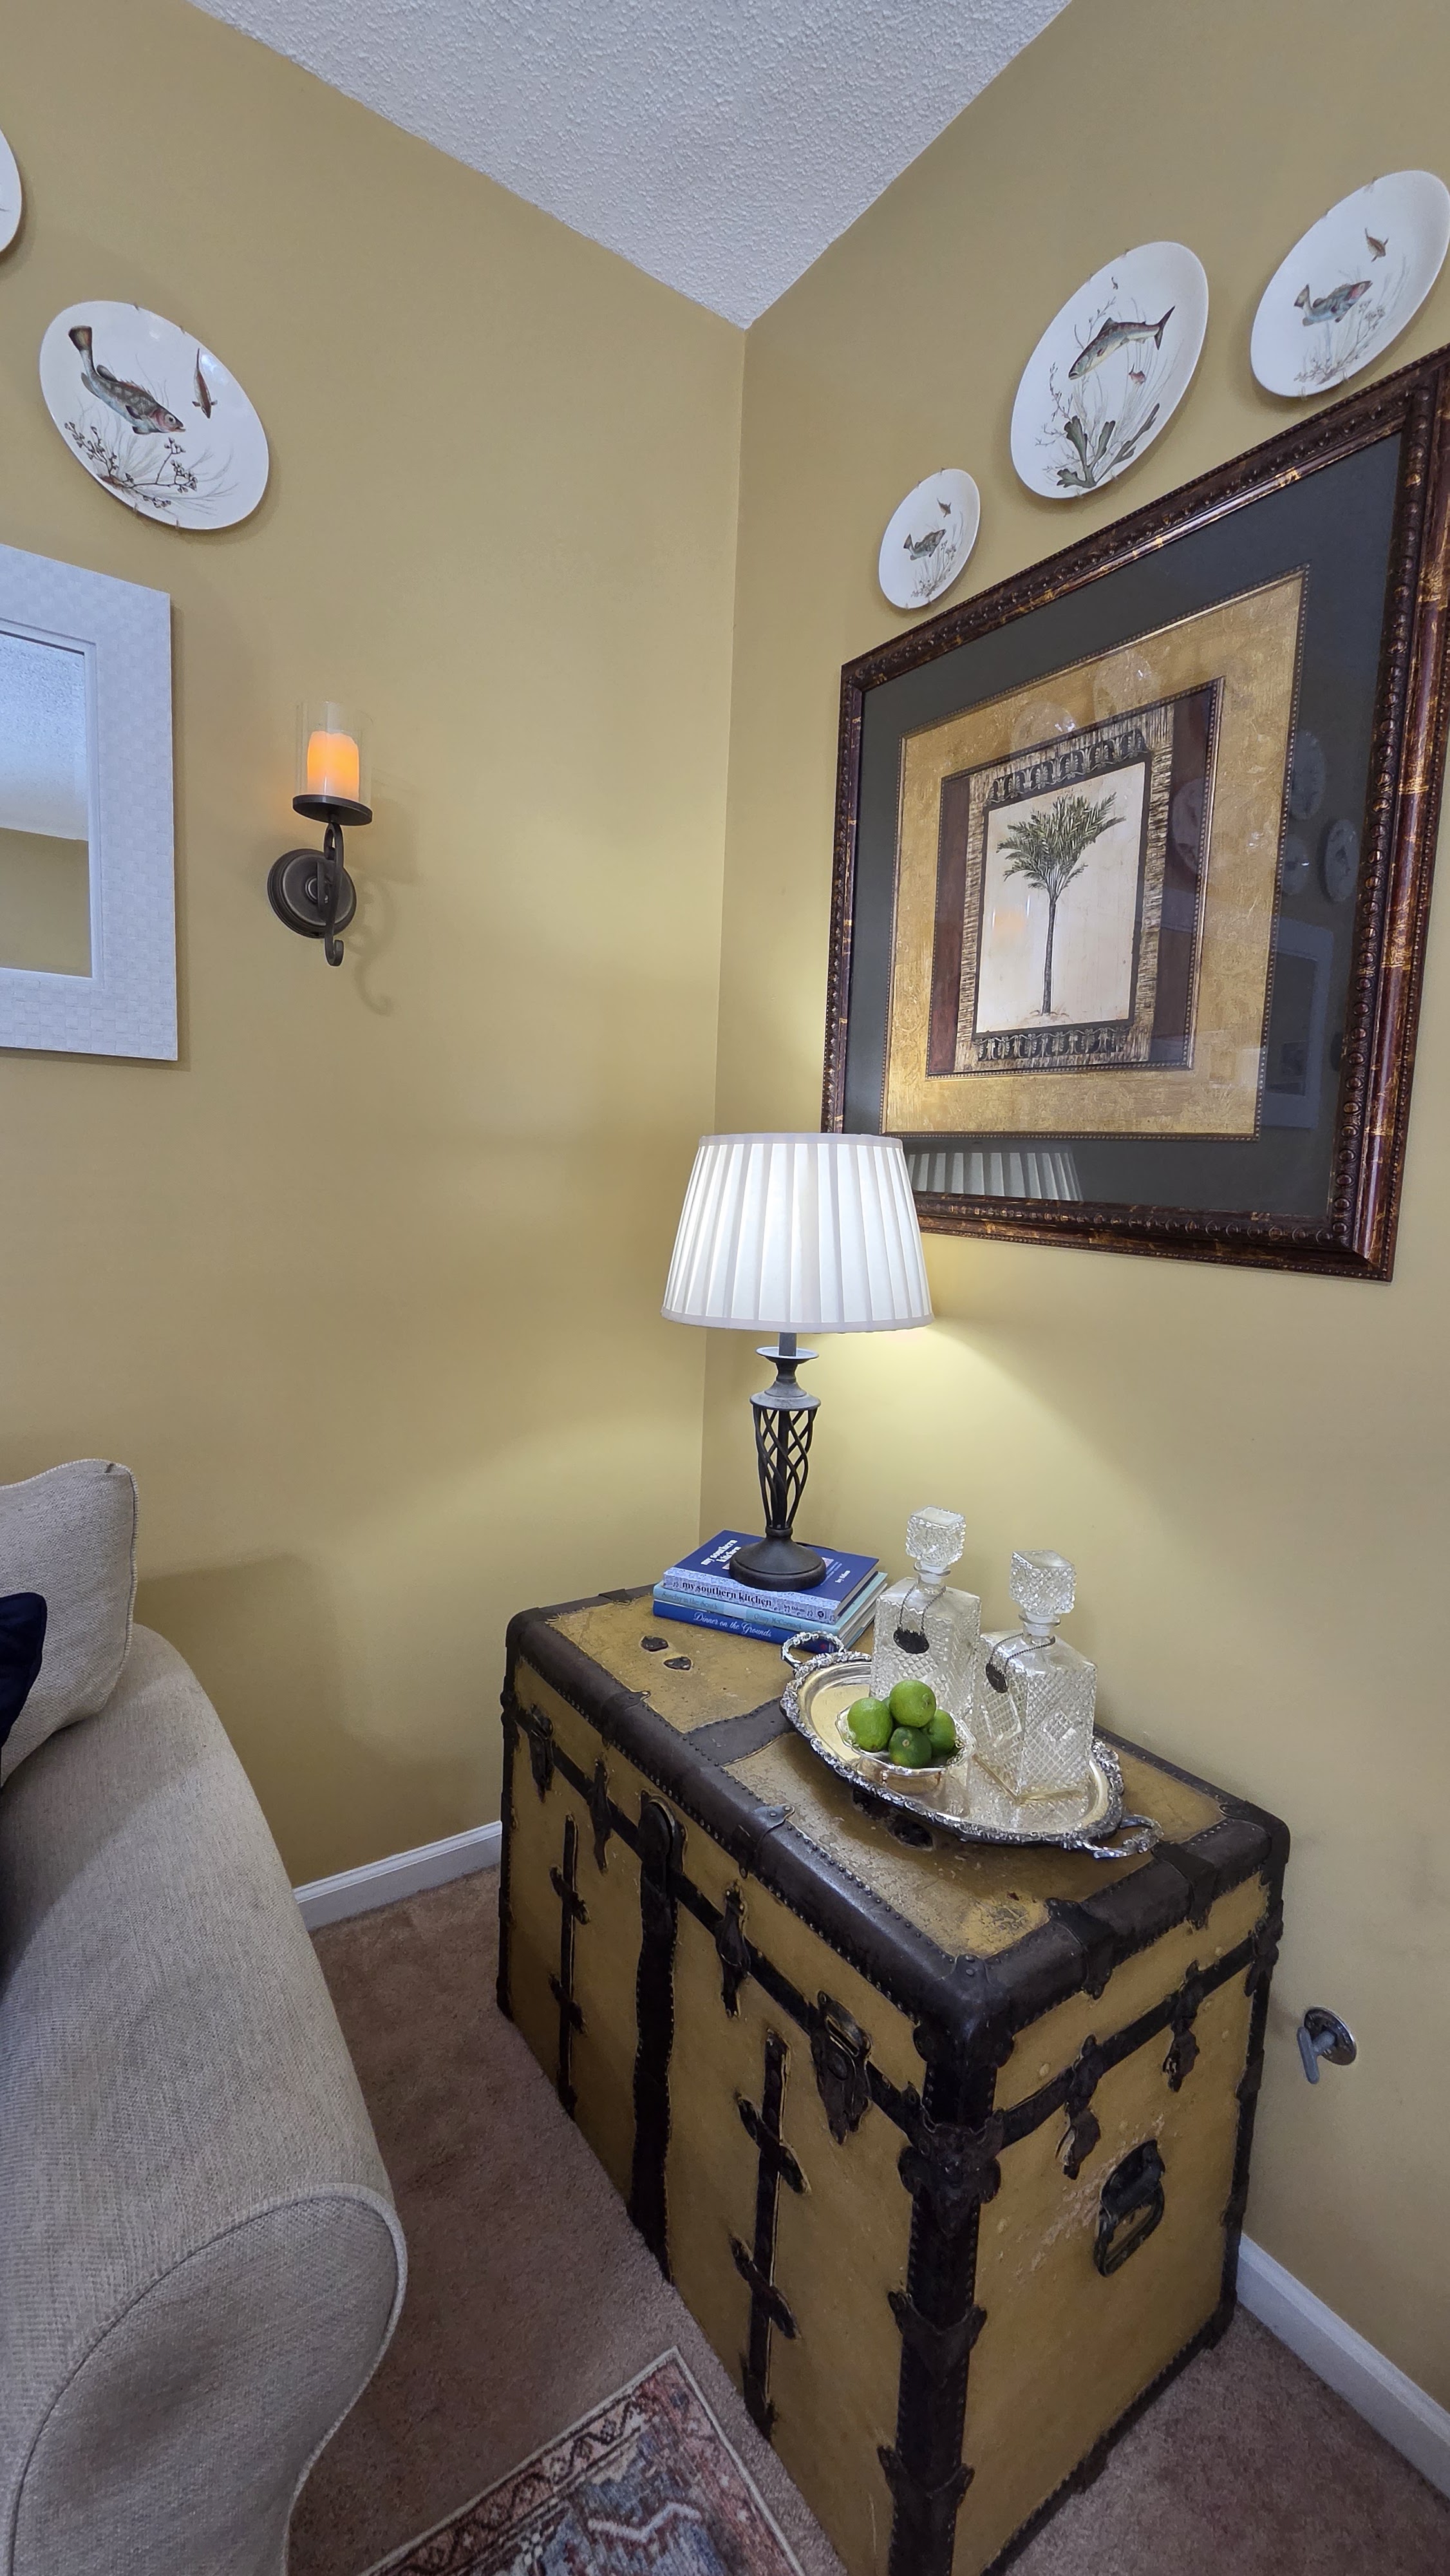
From the attic, we pulled down a pair of gorgeous palm prints which fit the asymmetrical walls perfectly—one wall is 59 inches and the other is 39 inches—and coordinated with the existing paint color and coastal vibe.

The new living room furniture placement.

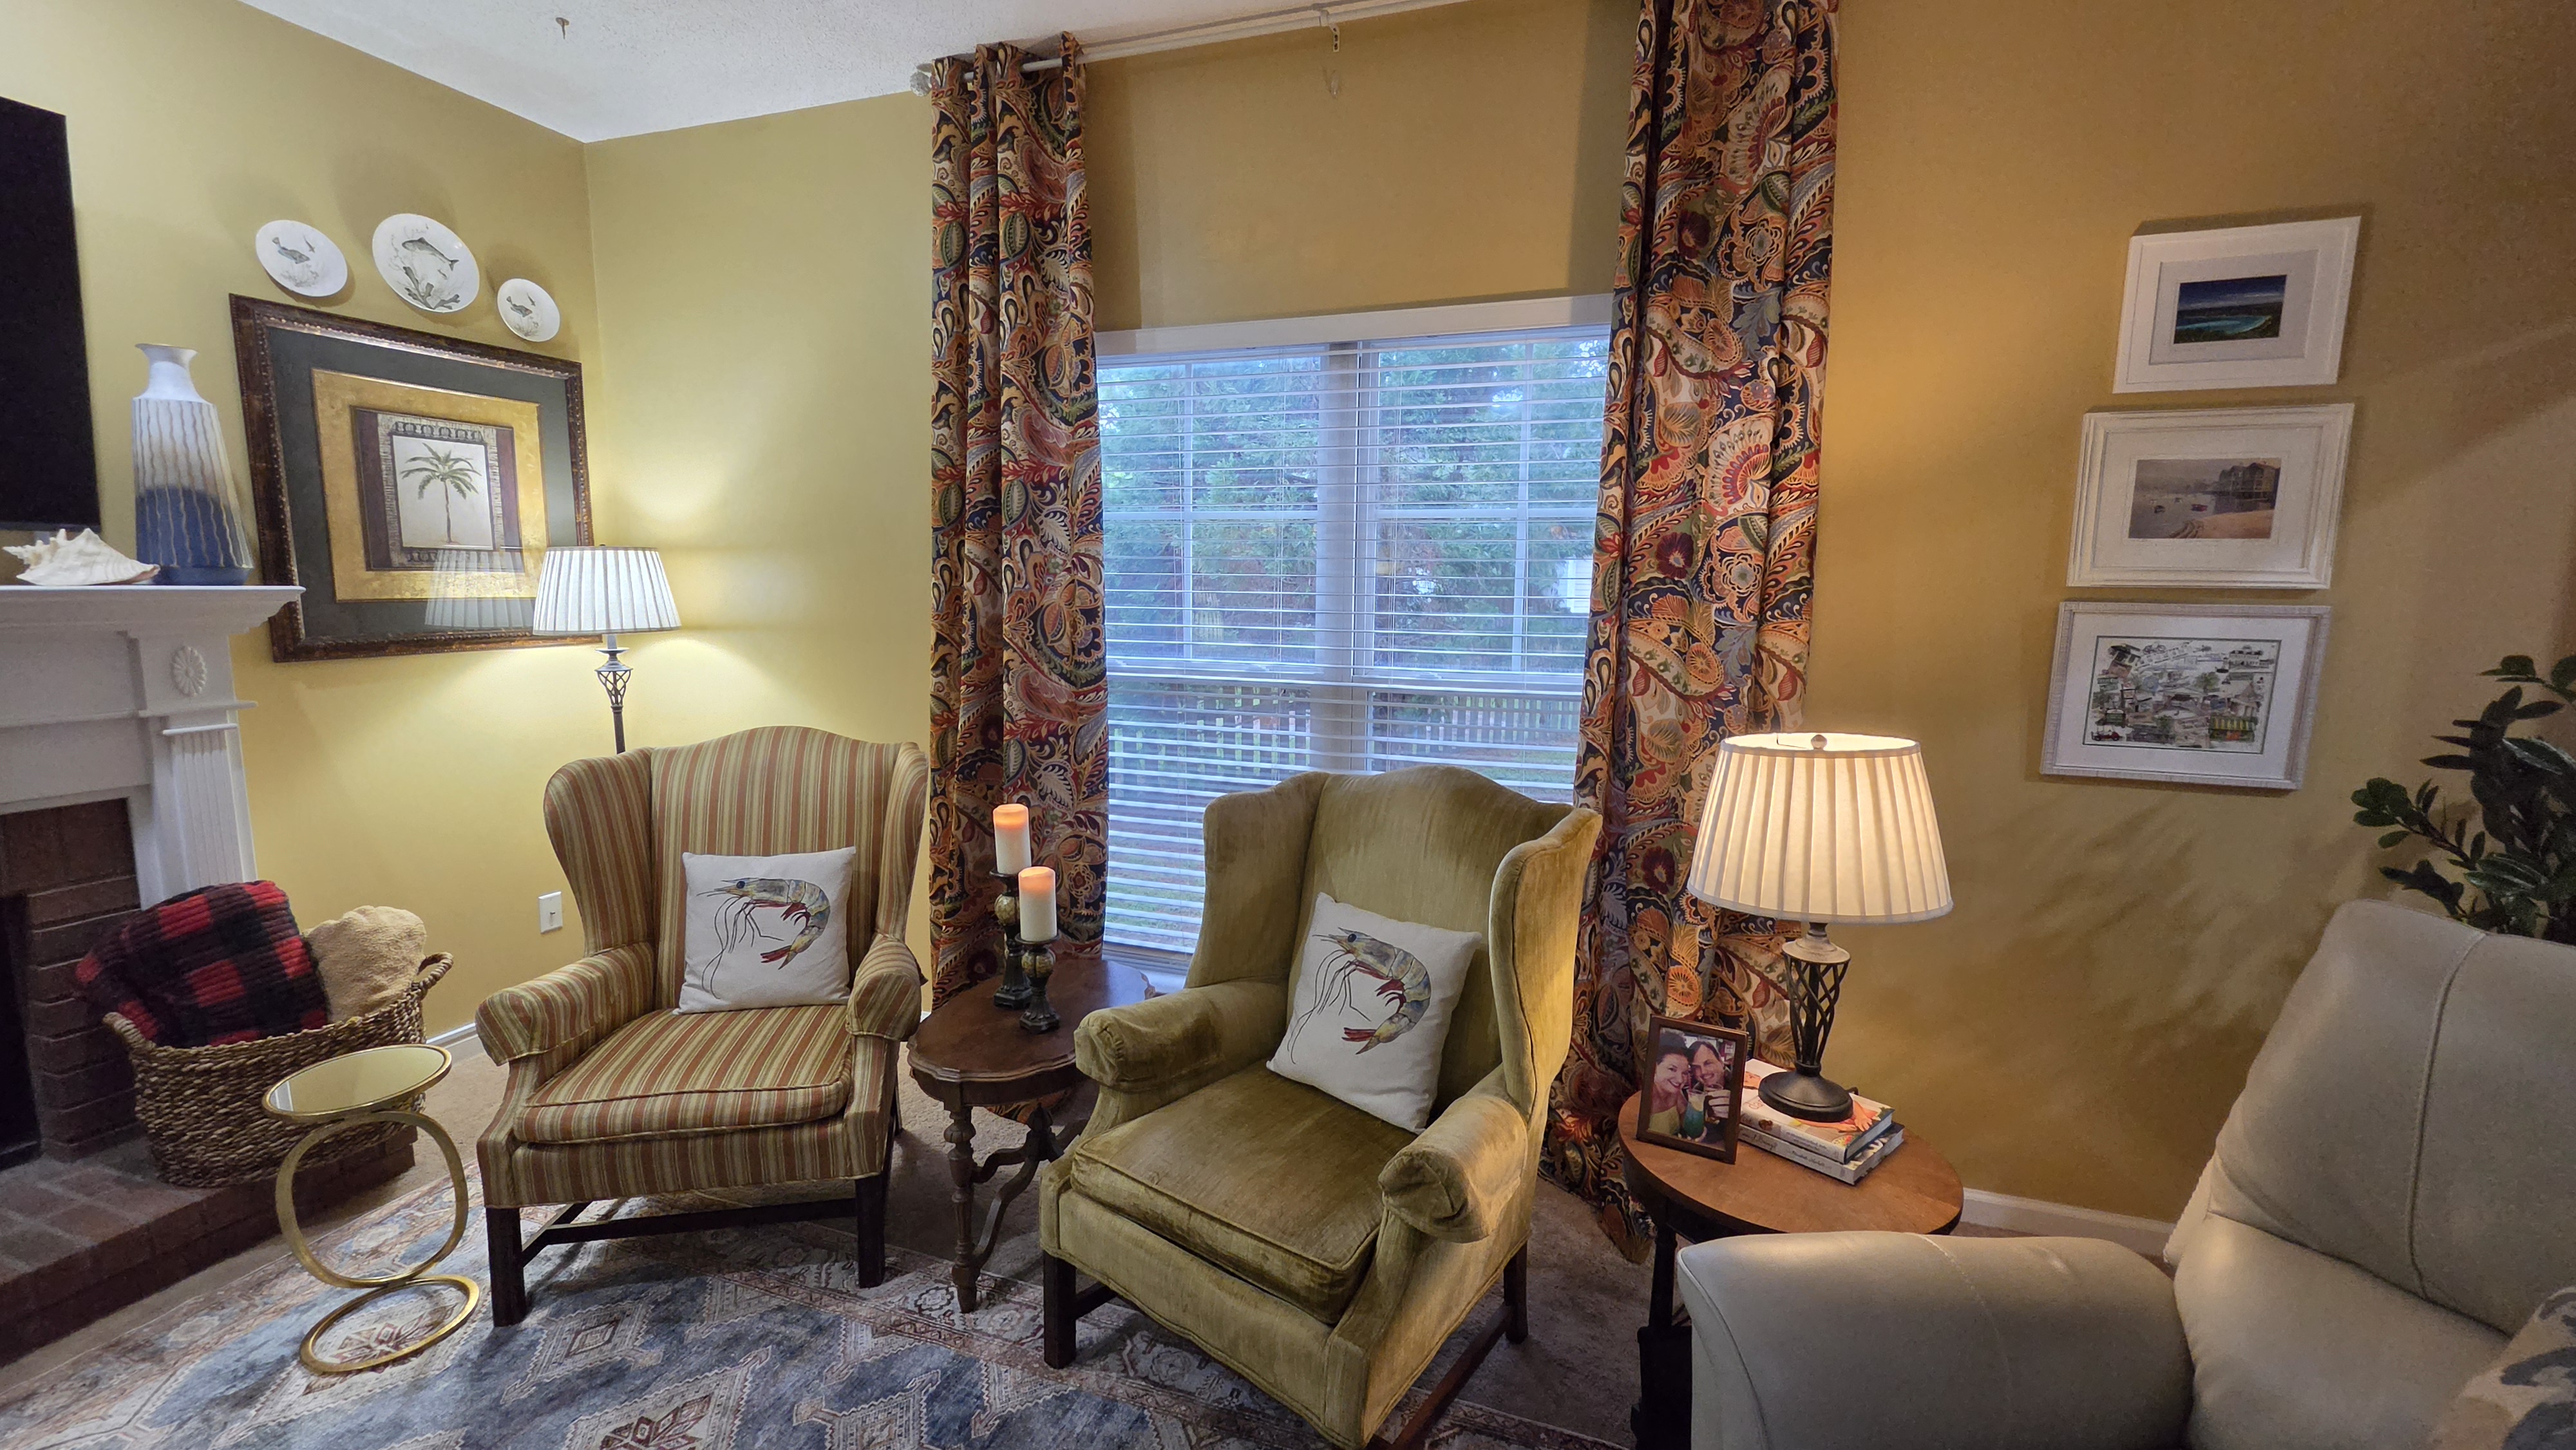
Once the TV stand was removed, I rearranged the furniture for better flow and added additional seating for entertaining—two classic wing back chairs with coordinating fabric from each our guest rooms. They have a greater impact when paired together. In the photo above, one bookshelf stands on the wall next to the fireplace, throwing off the balance.
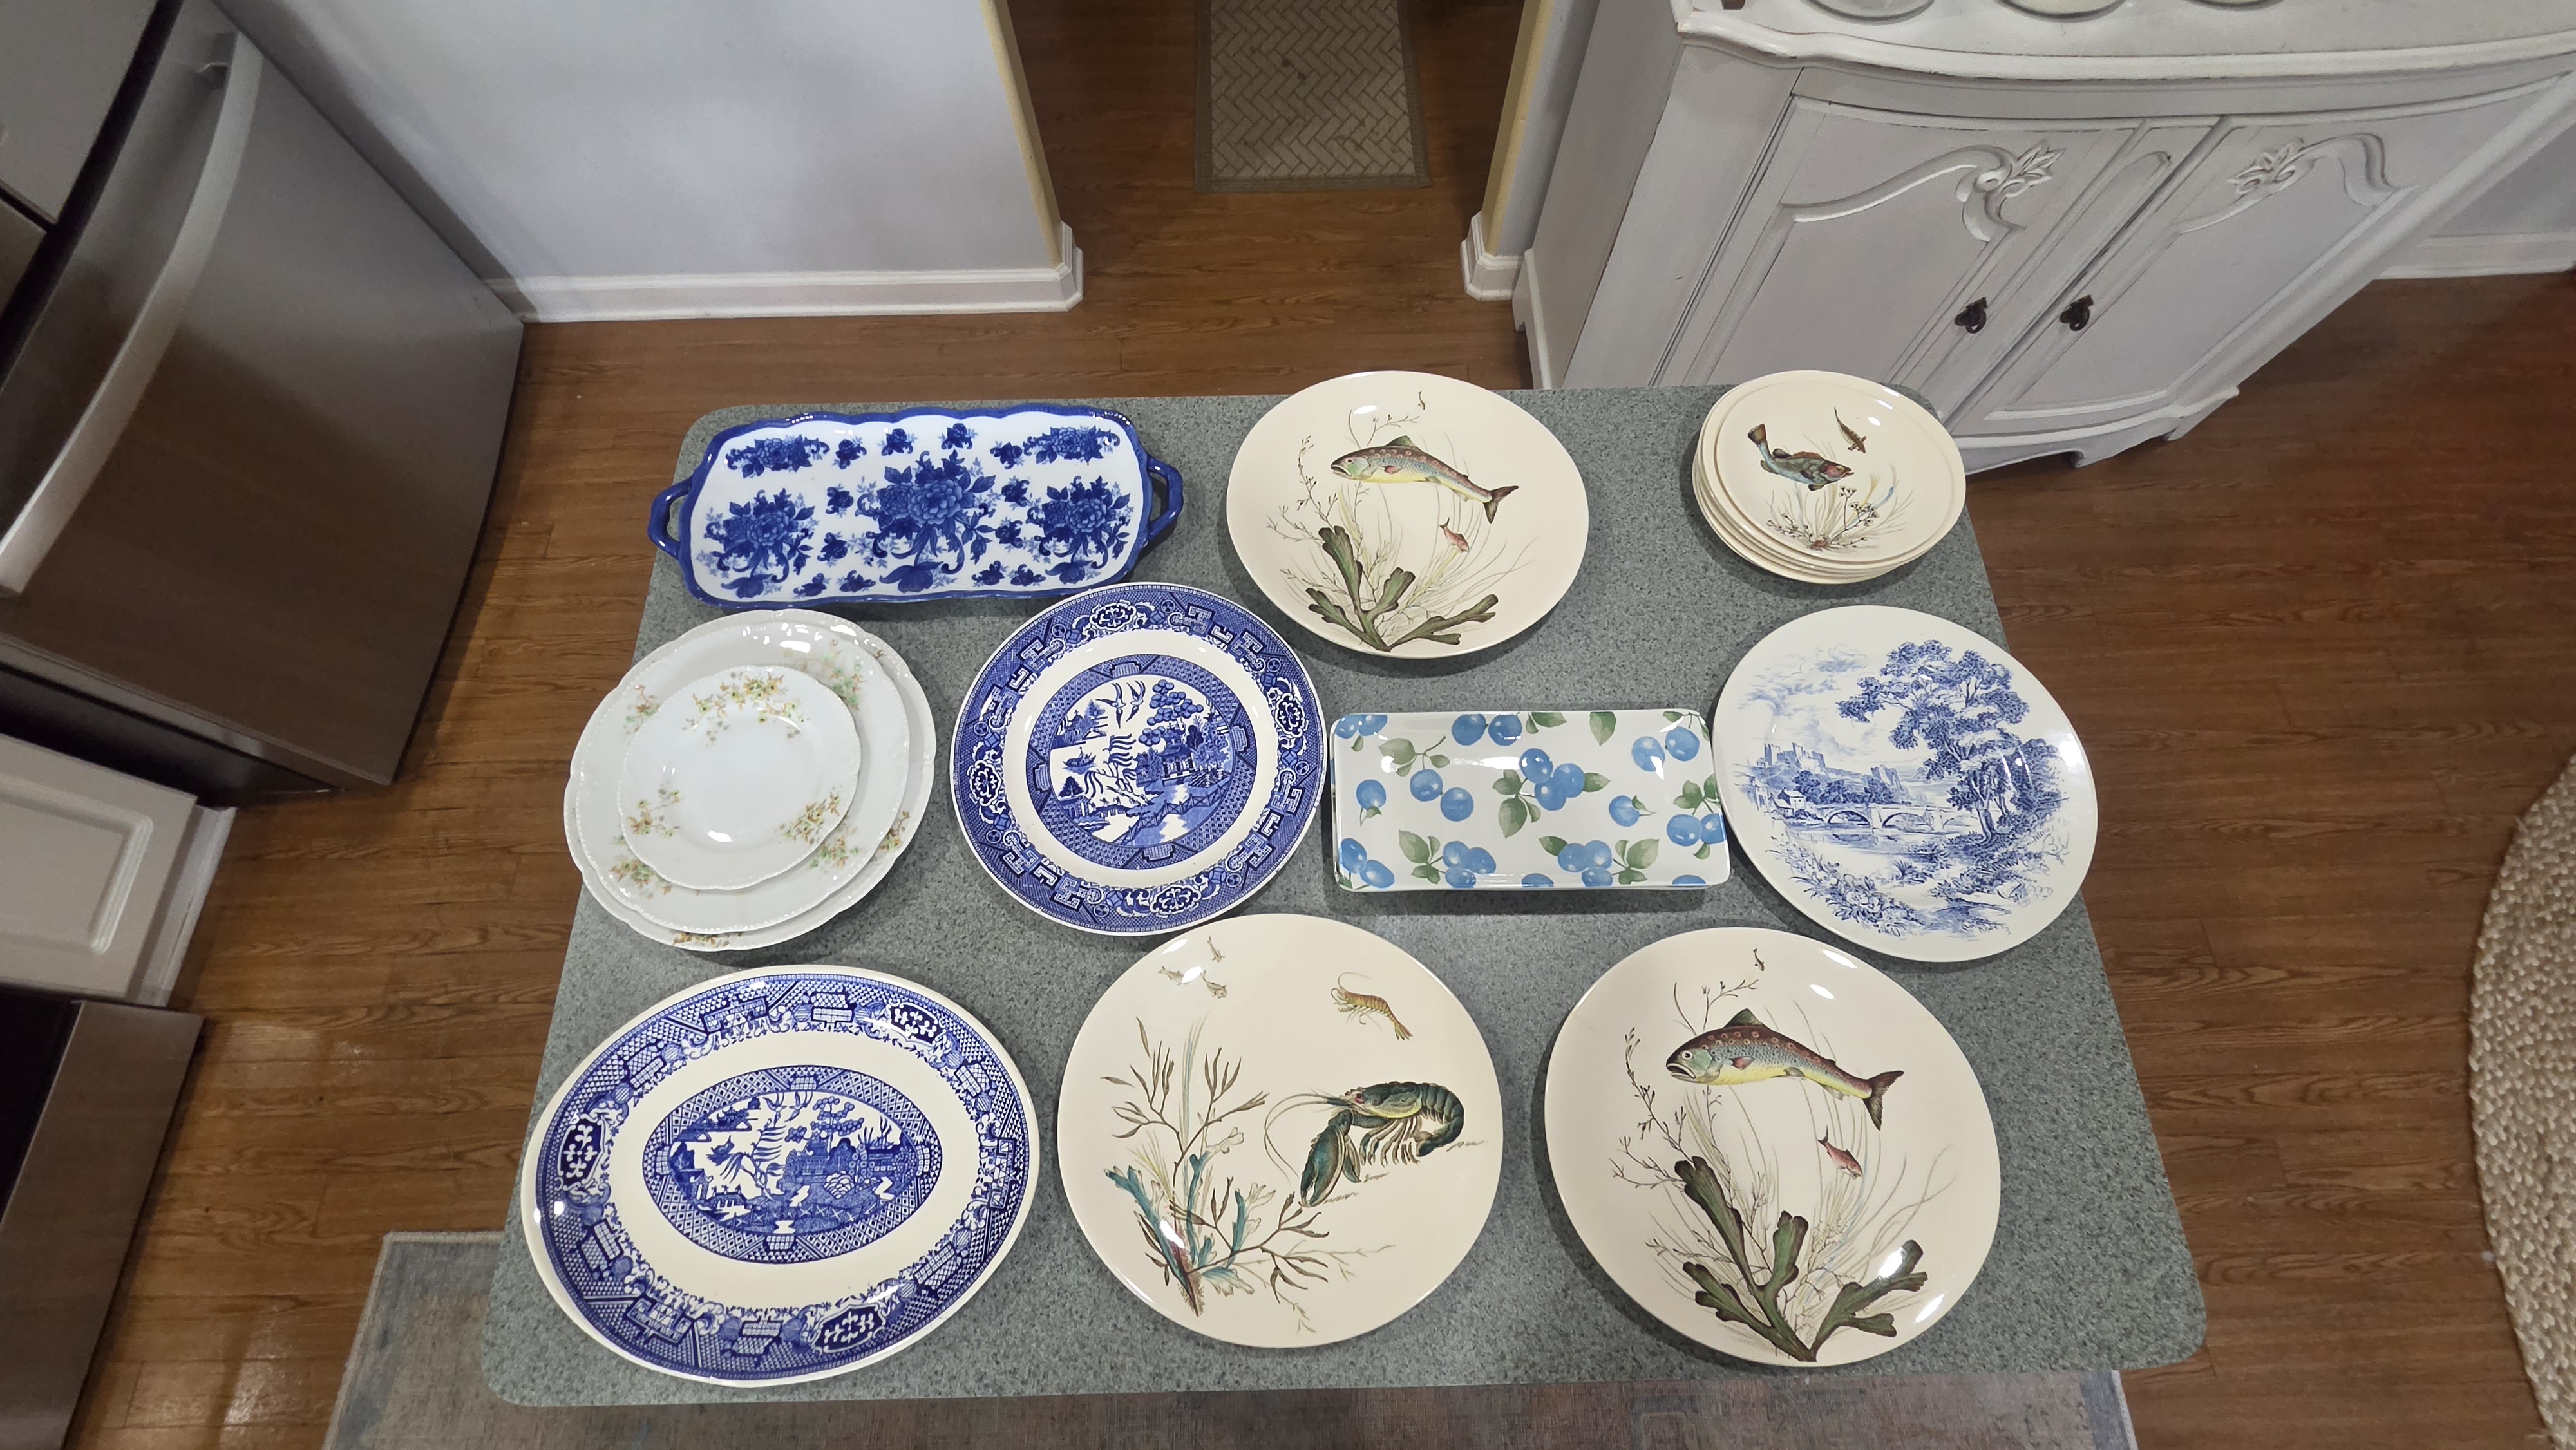
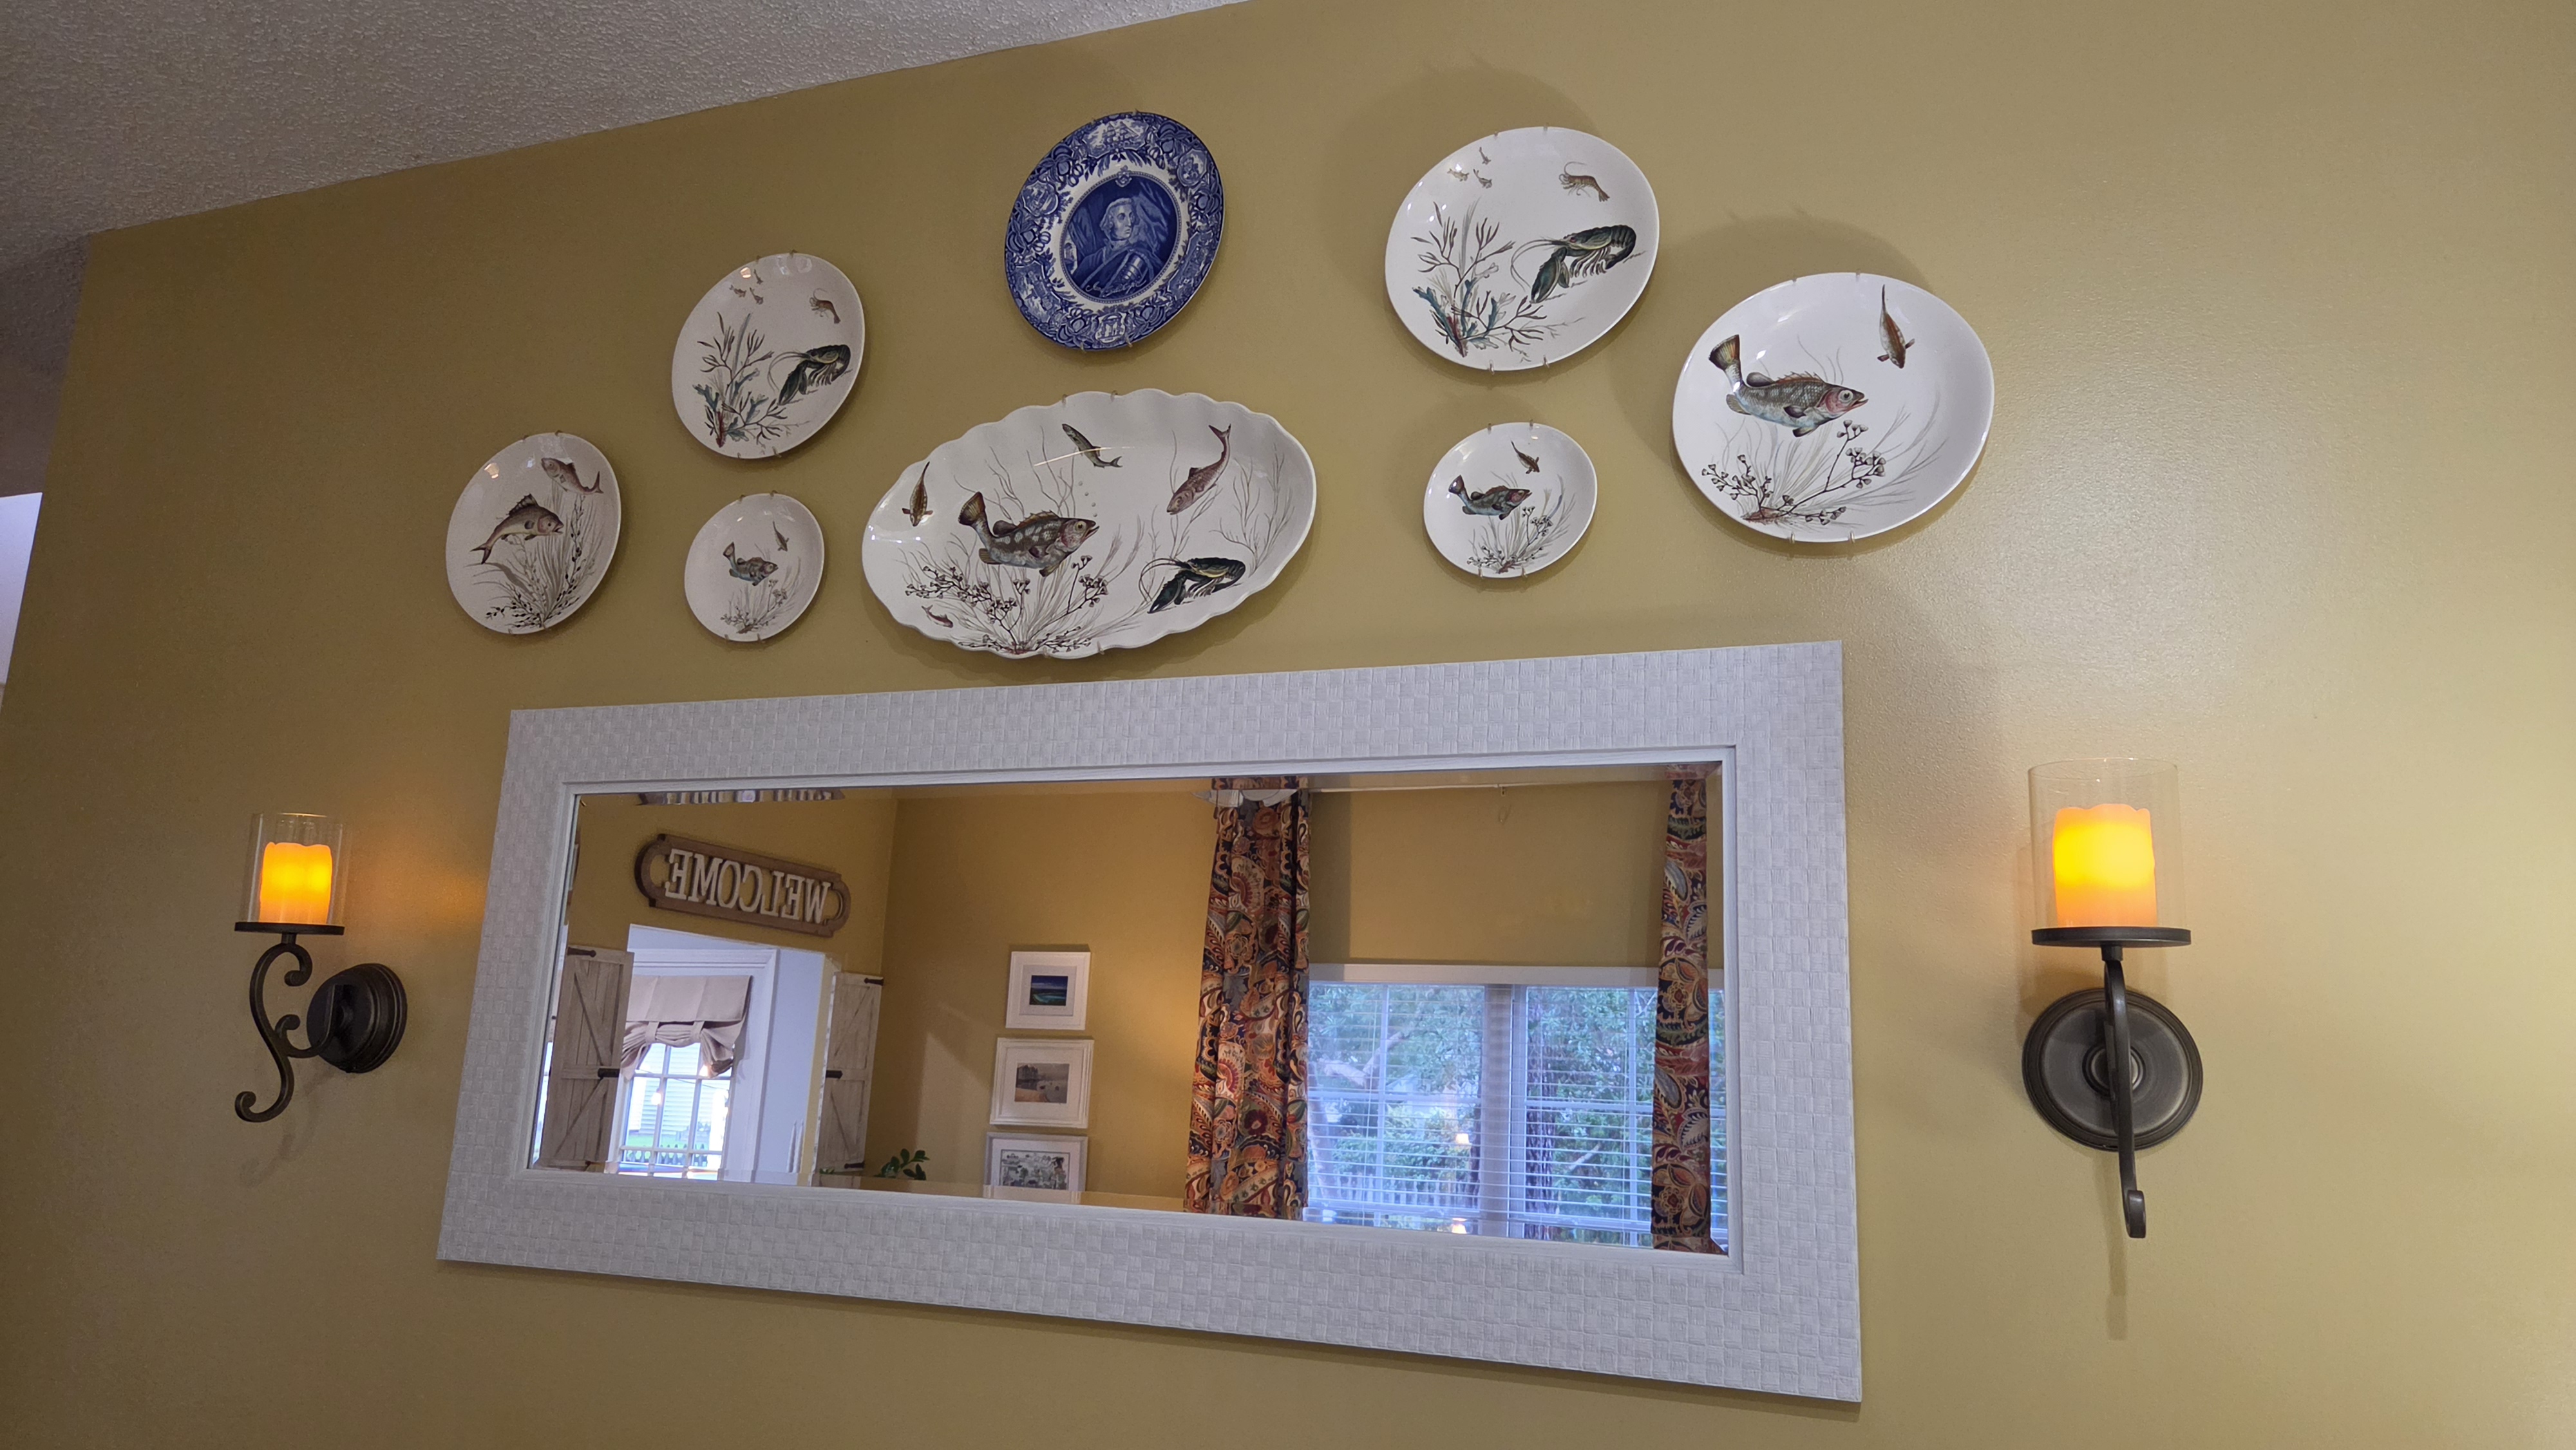
These fine China pieces are incorporated as wall art and in bookshelf styling throughout the home.

My kitchen baker’s rack cabinet was full of these very unique fine China plates made in England, featuring fish, lobster and coral which I inherited from my mother-in-law. I only ever use them on Thanksgiving or for special family meals, but I’ve always loved the design of them. Adding them to the walls not only freed up valuable storage in the cabinet but would make for beautiful wall art and symmetry above palm tree photos and mirror.
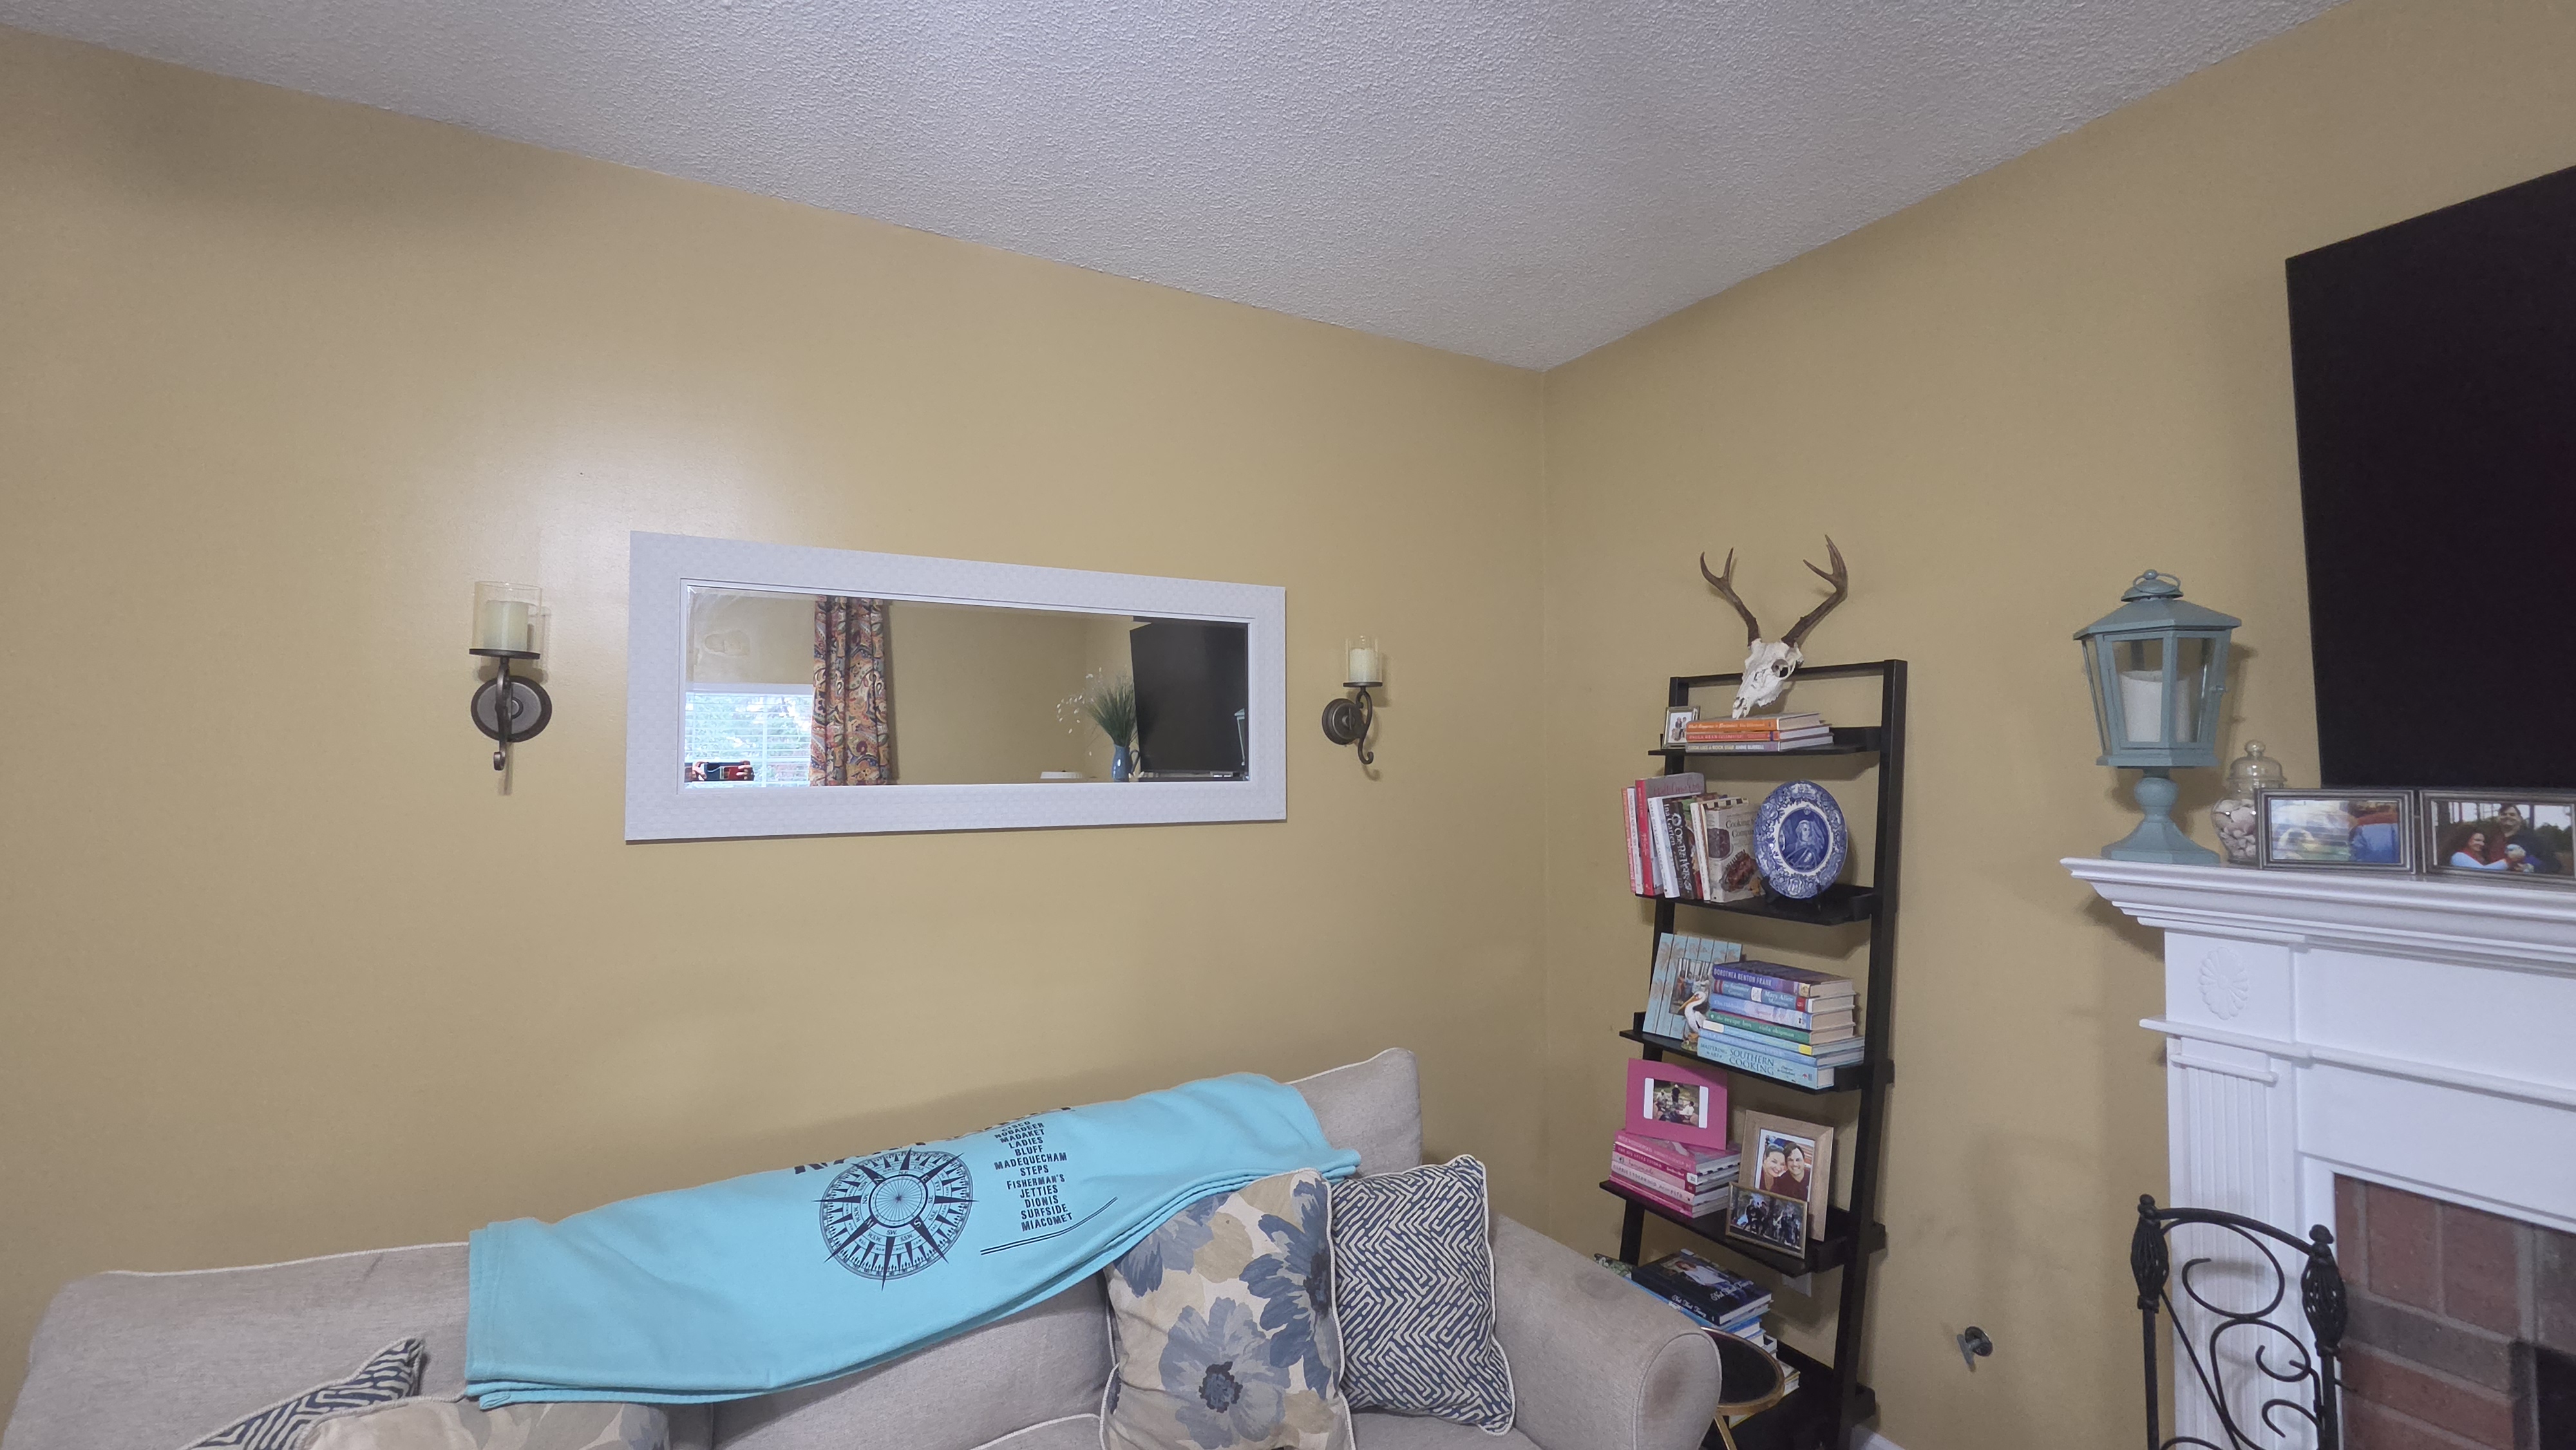
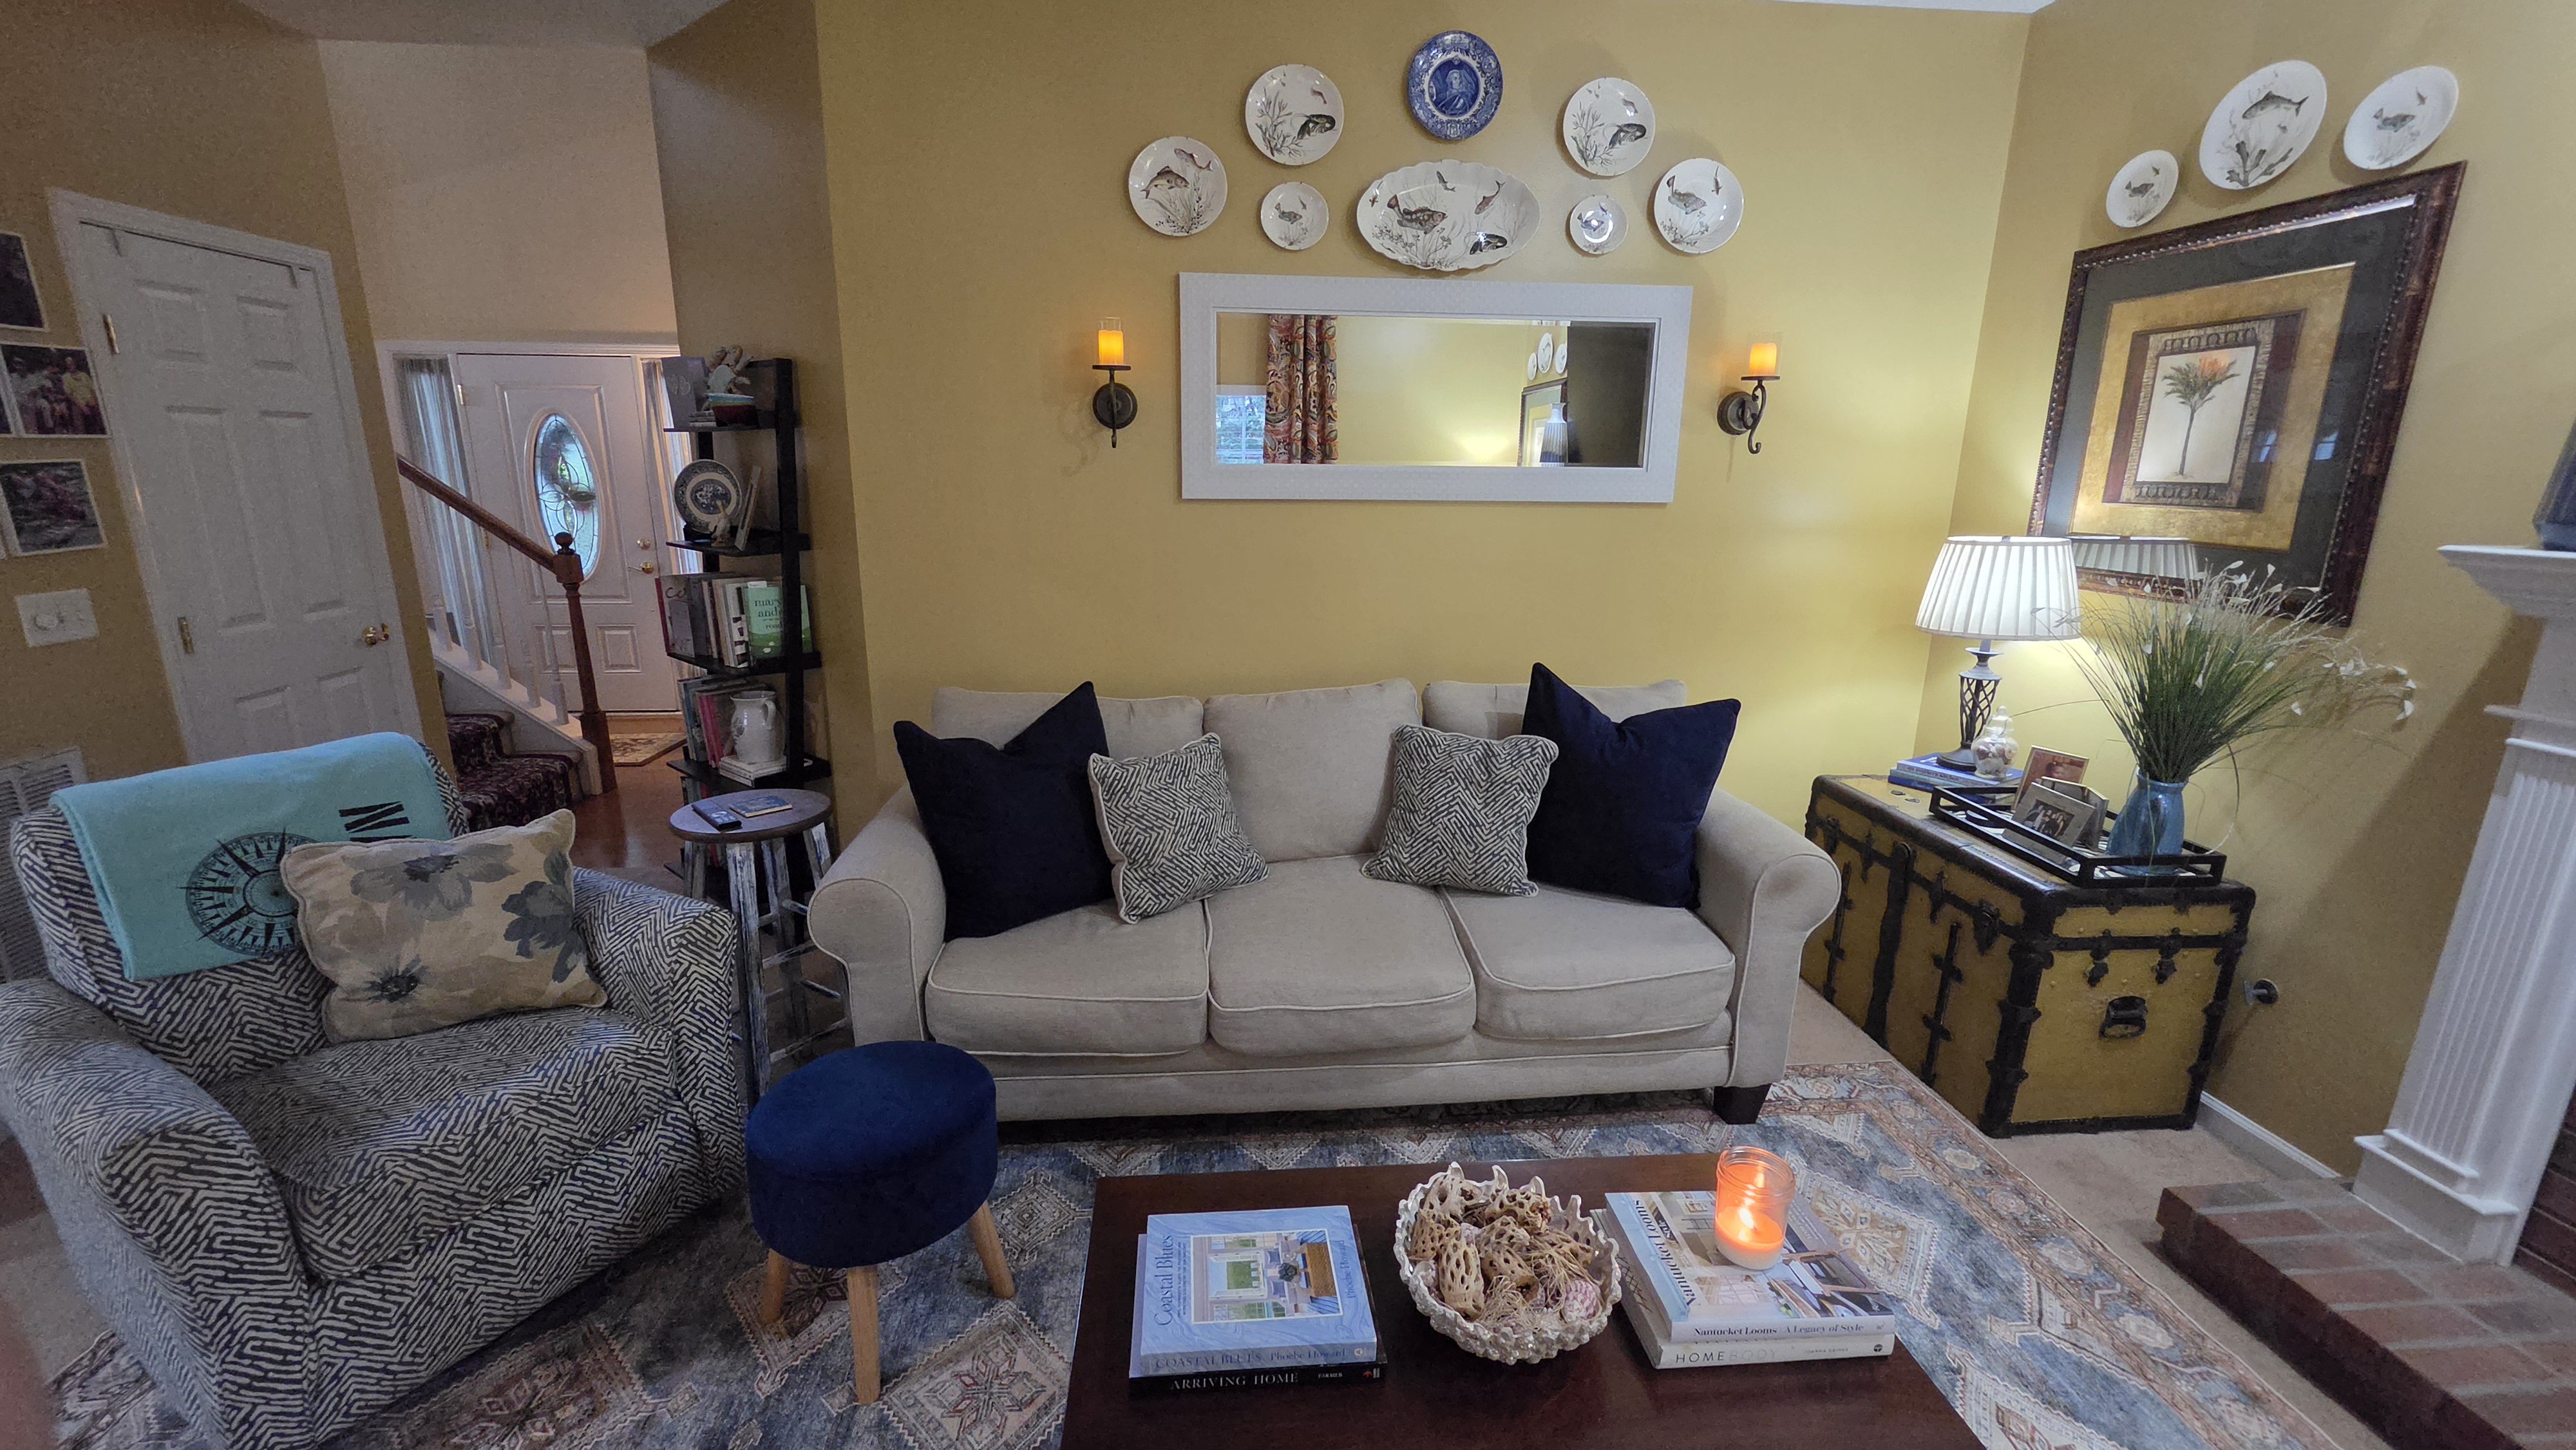
The sconces were inherited from Rebekah’s mom and provide warmth and balance in the space.

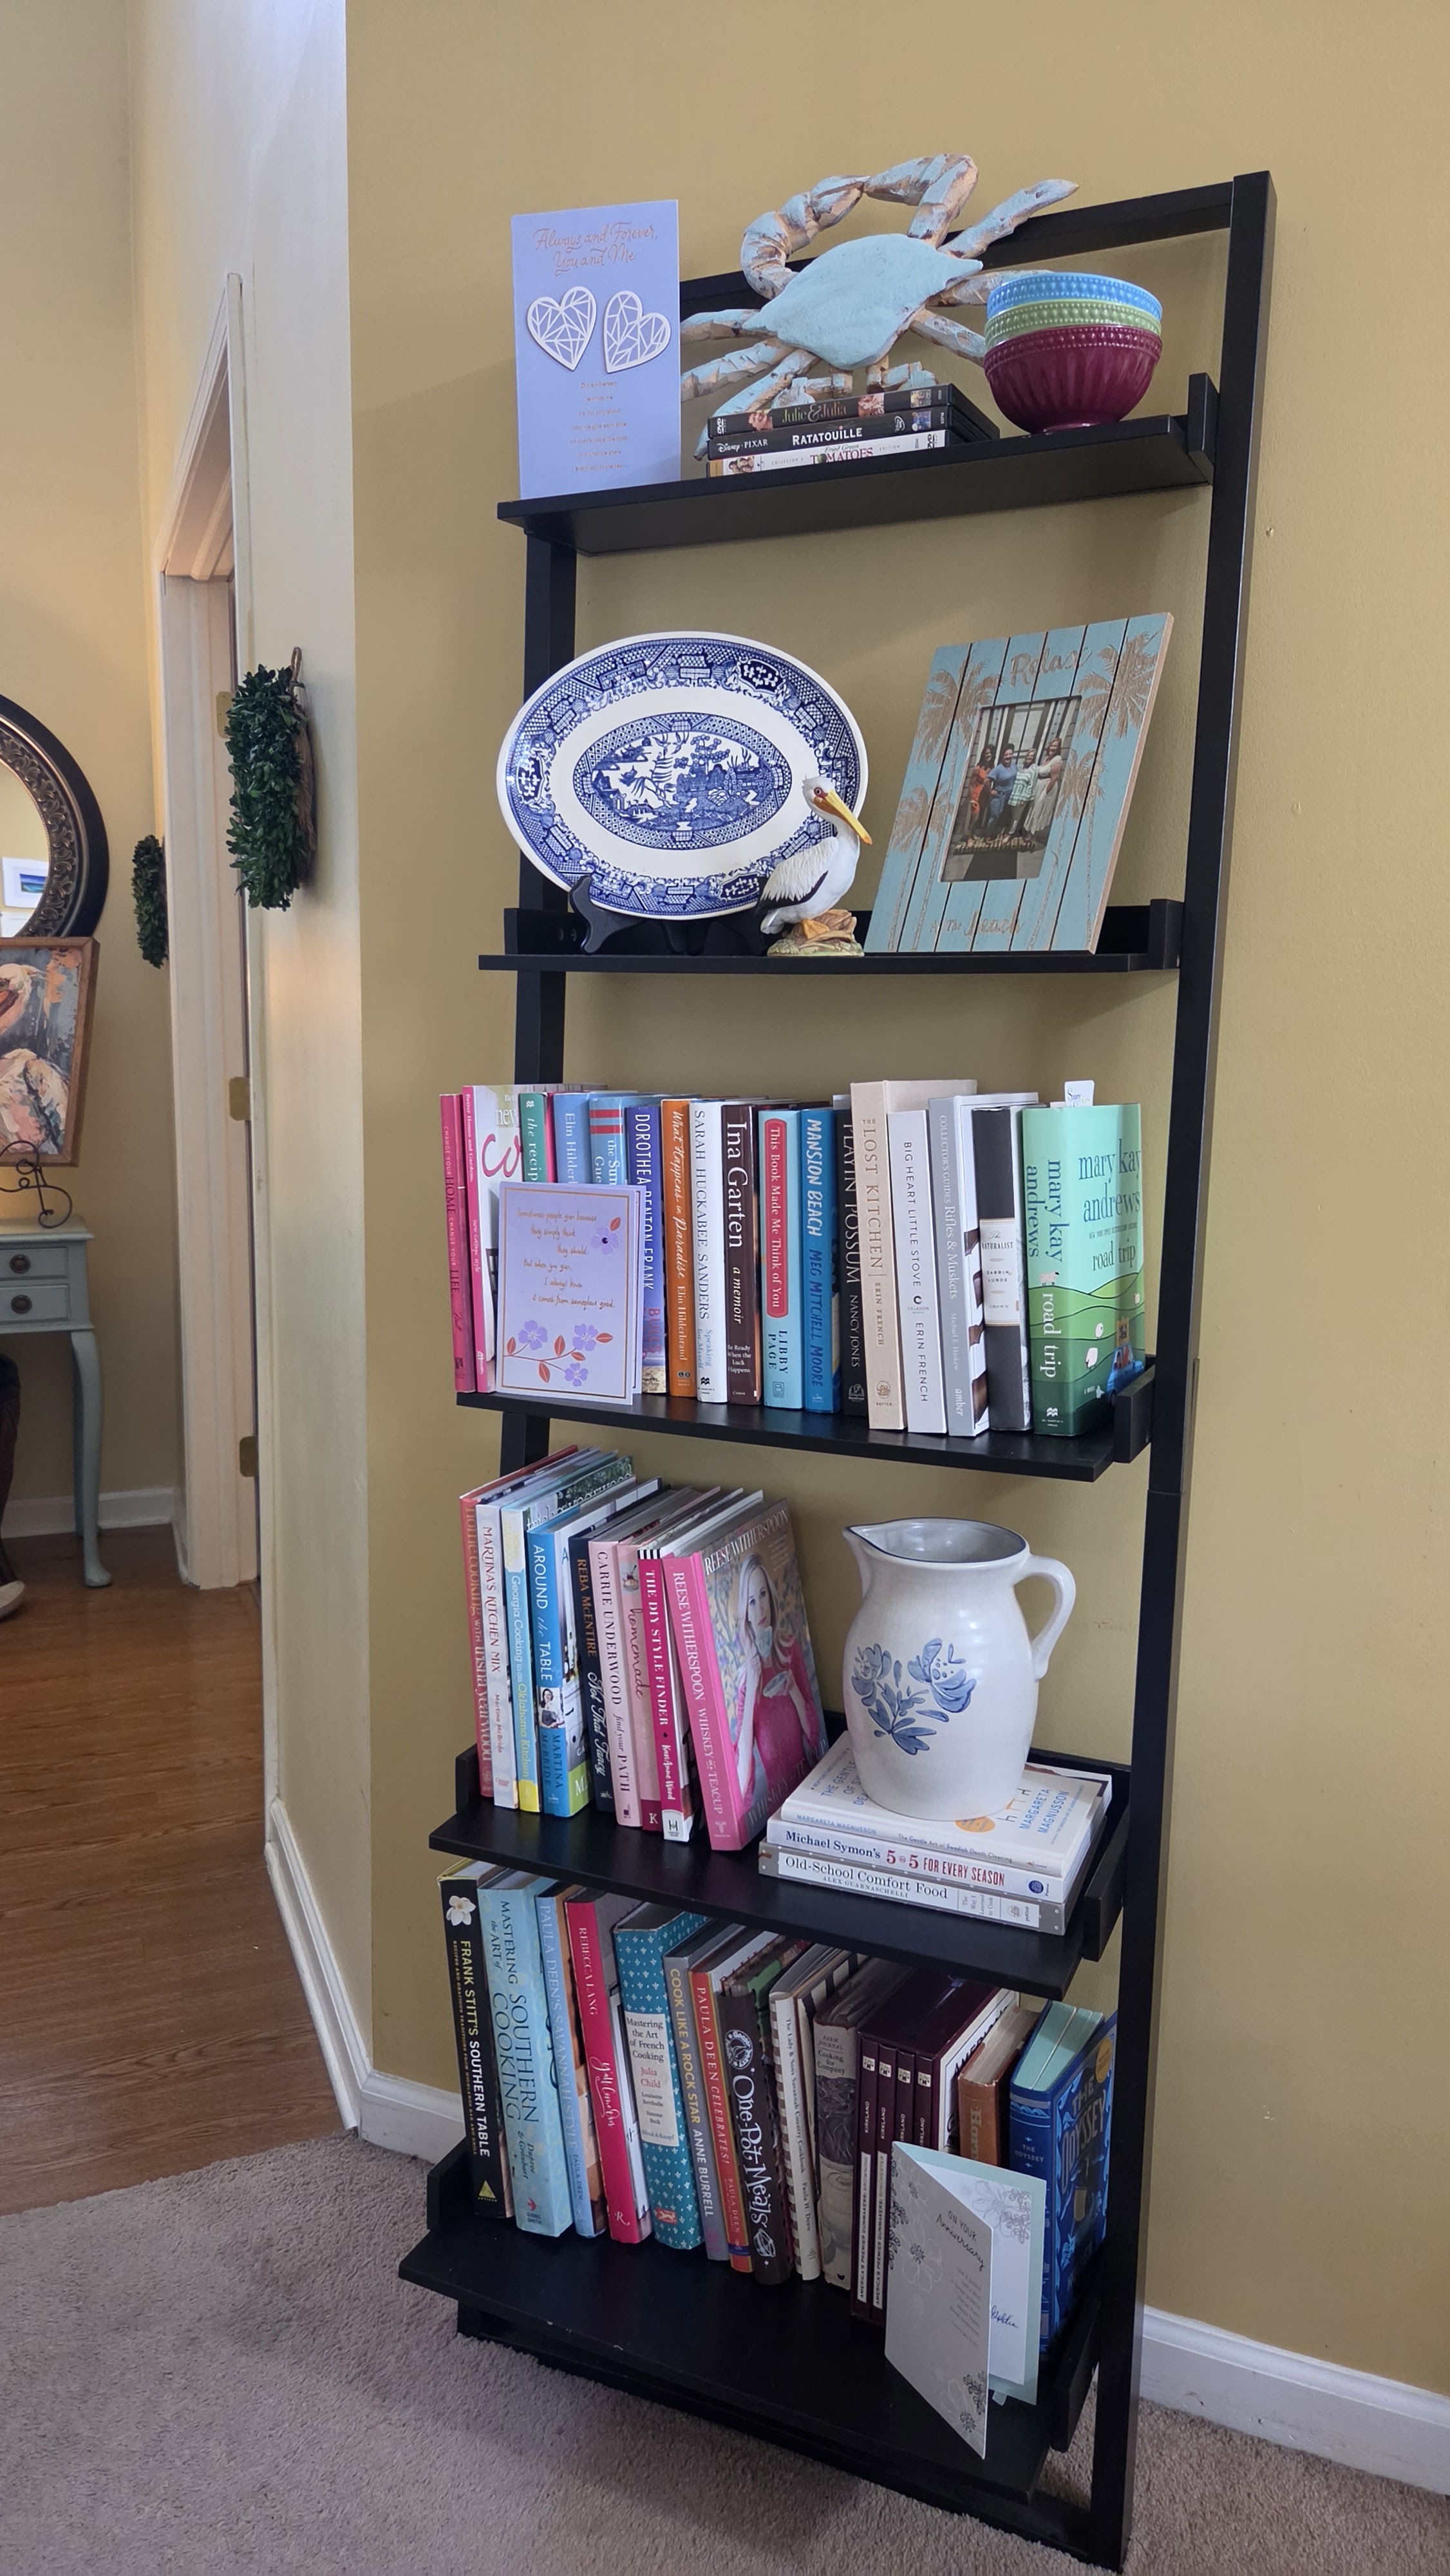
To make the space feel bigger, I placed the white mirror from the angled wall horizontally above the couch and flanked it with sconces I inherited from my mother. The sconces provide balance and symmetry while also adding soft lighting and a warm glow to the living room in the evenings. This freed up the angled wall to hold the single tall bookshelf, which was a much better fit here. I saved three food-inspired DVDs from a large collection we donated for the top of the bookshelf: Fried Green Tomatoes, Ratatouille and Julie and Julia. I couldn’t bring myself to part with these classics!

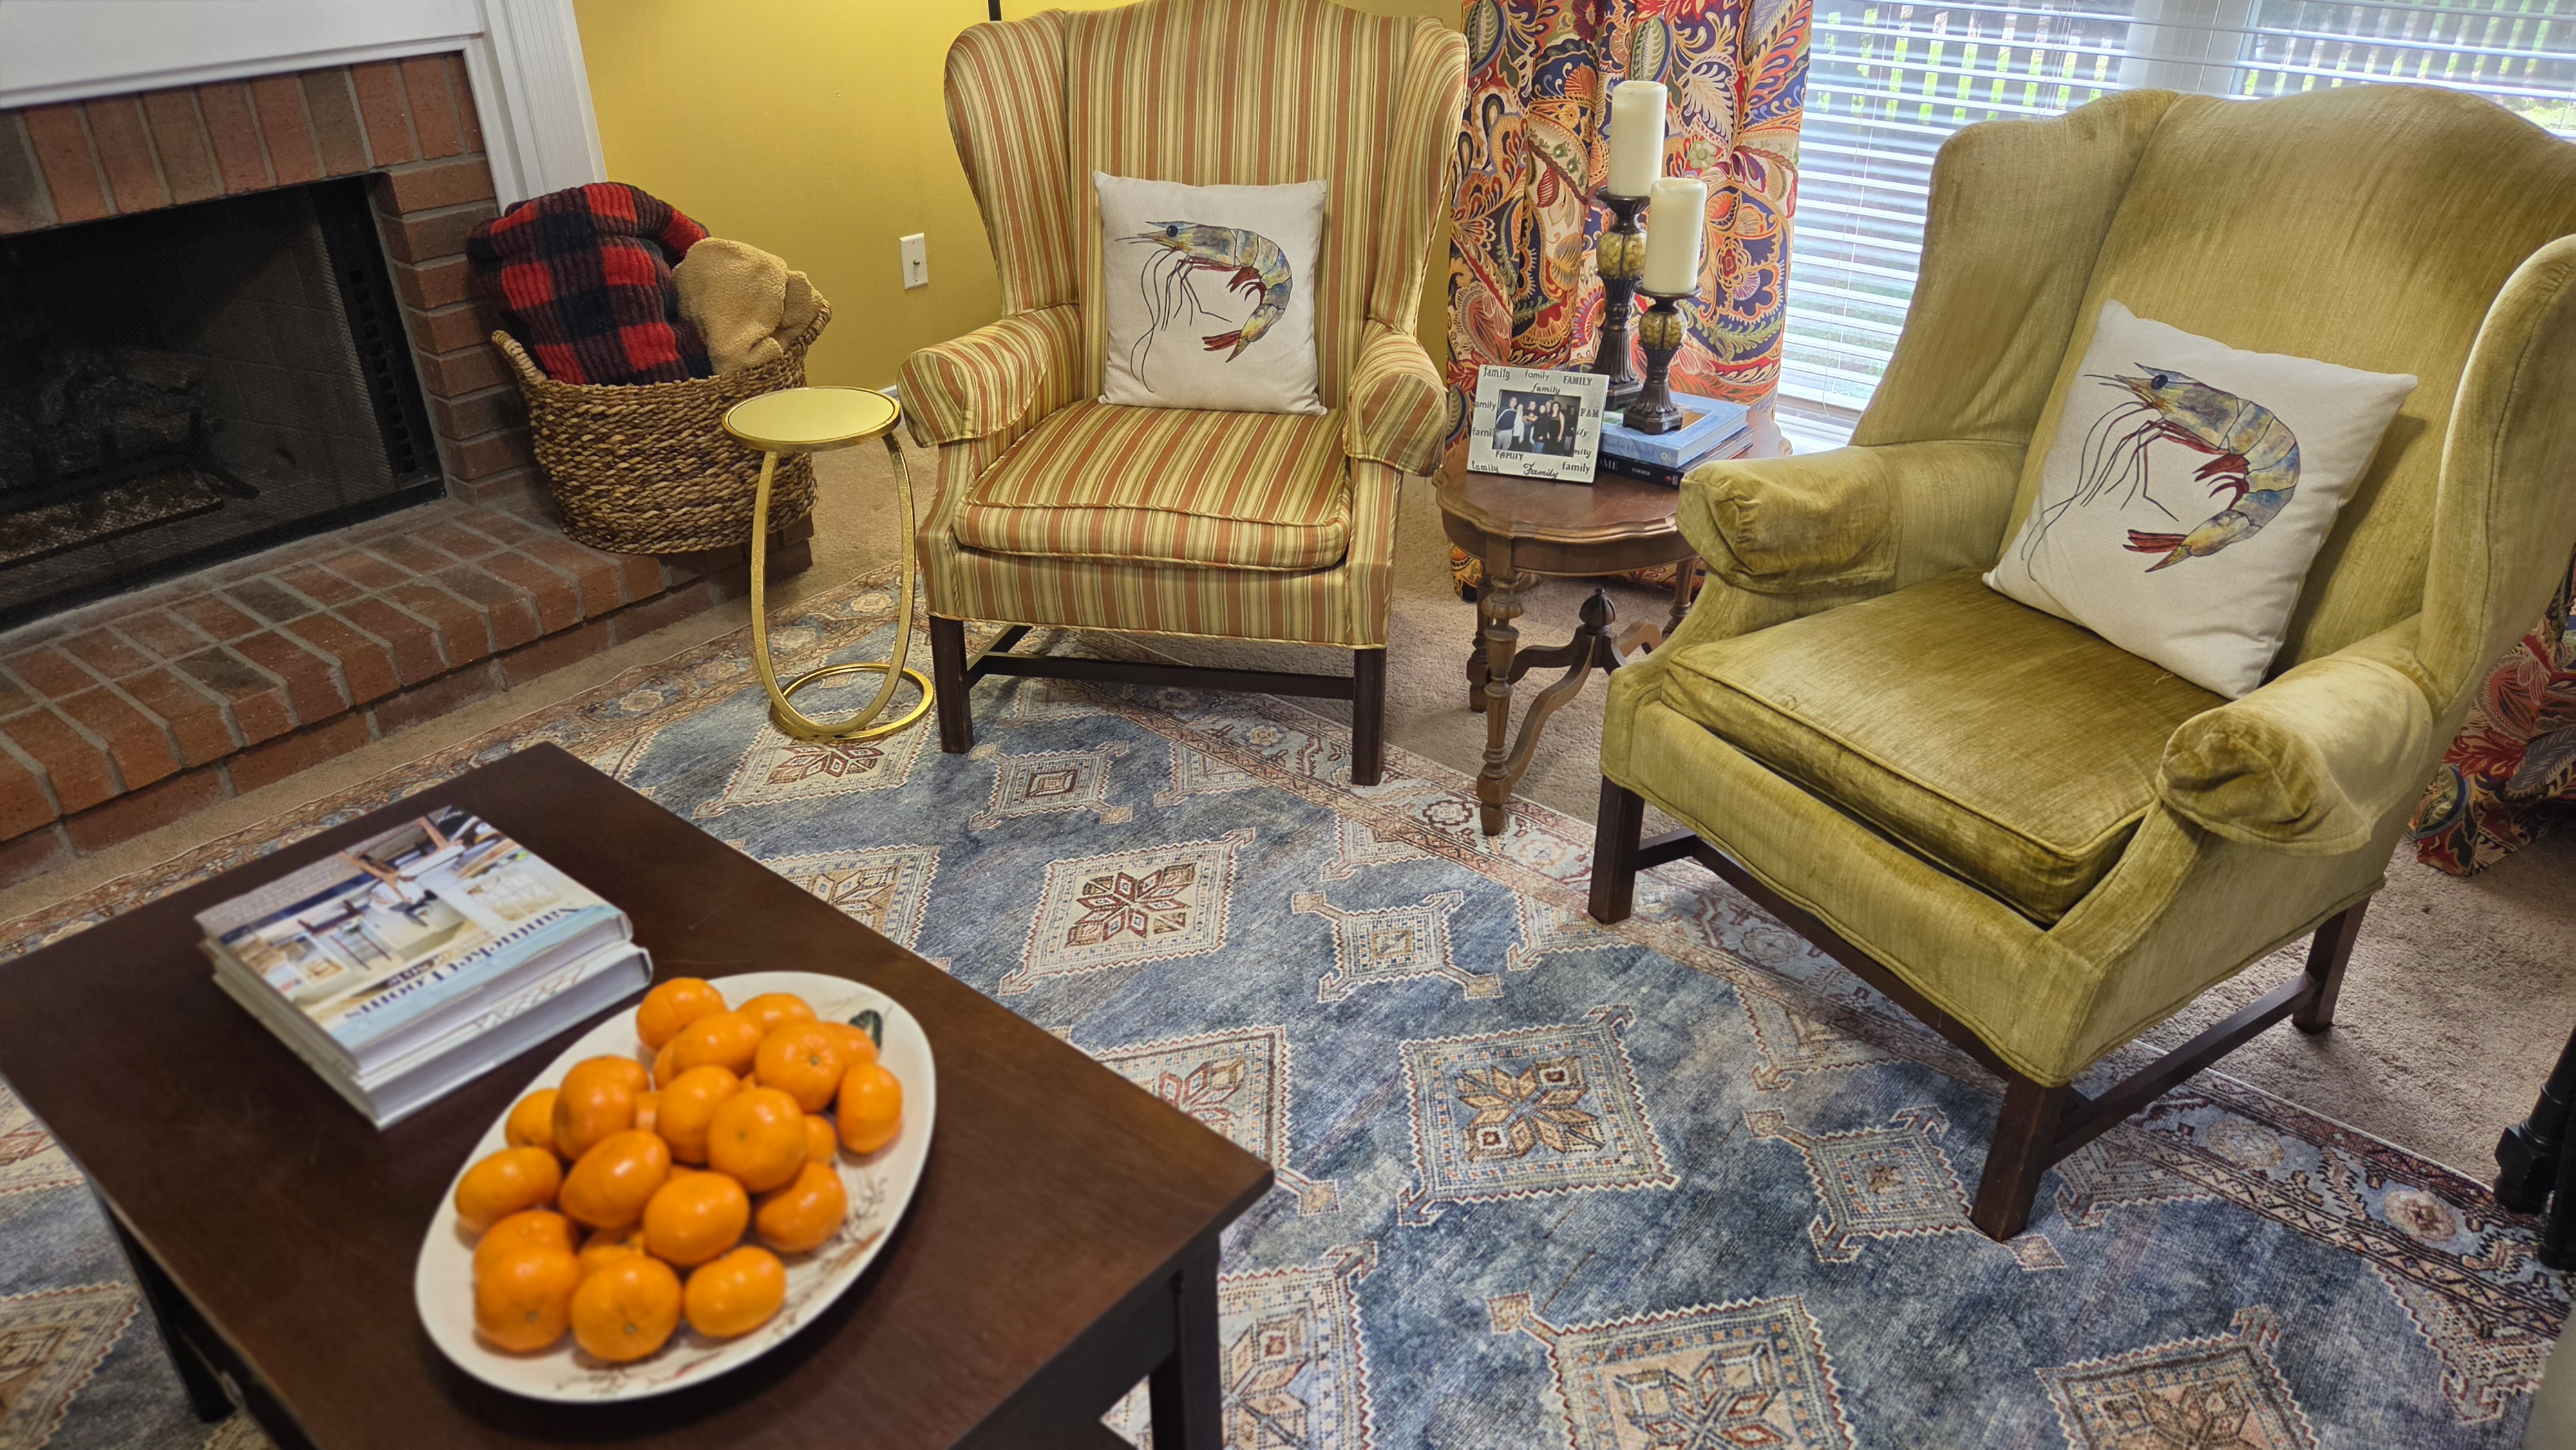
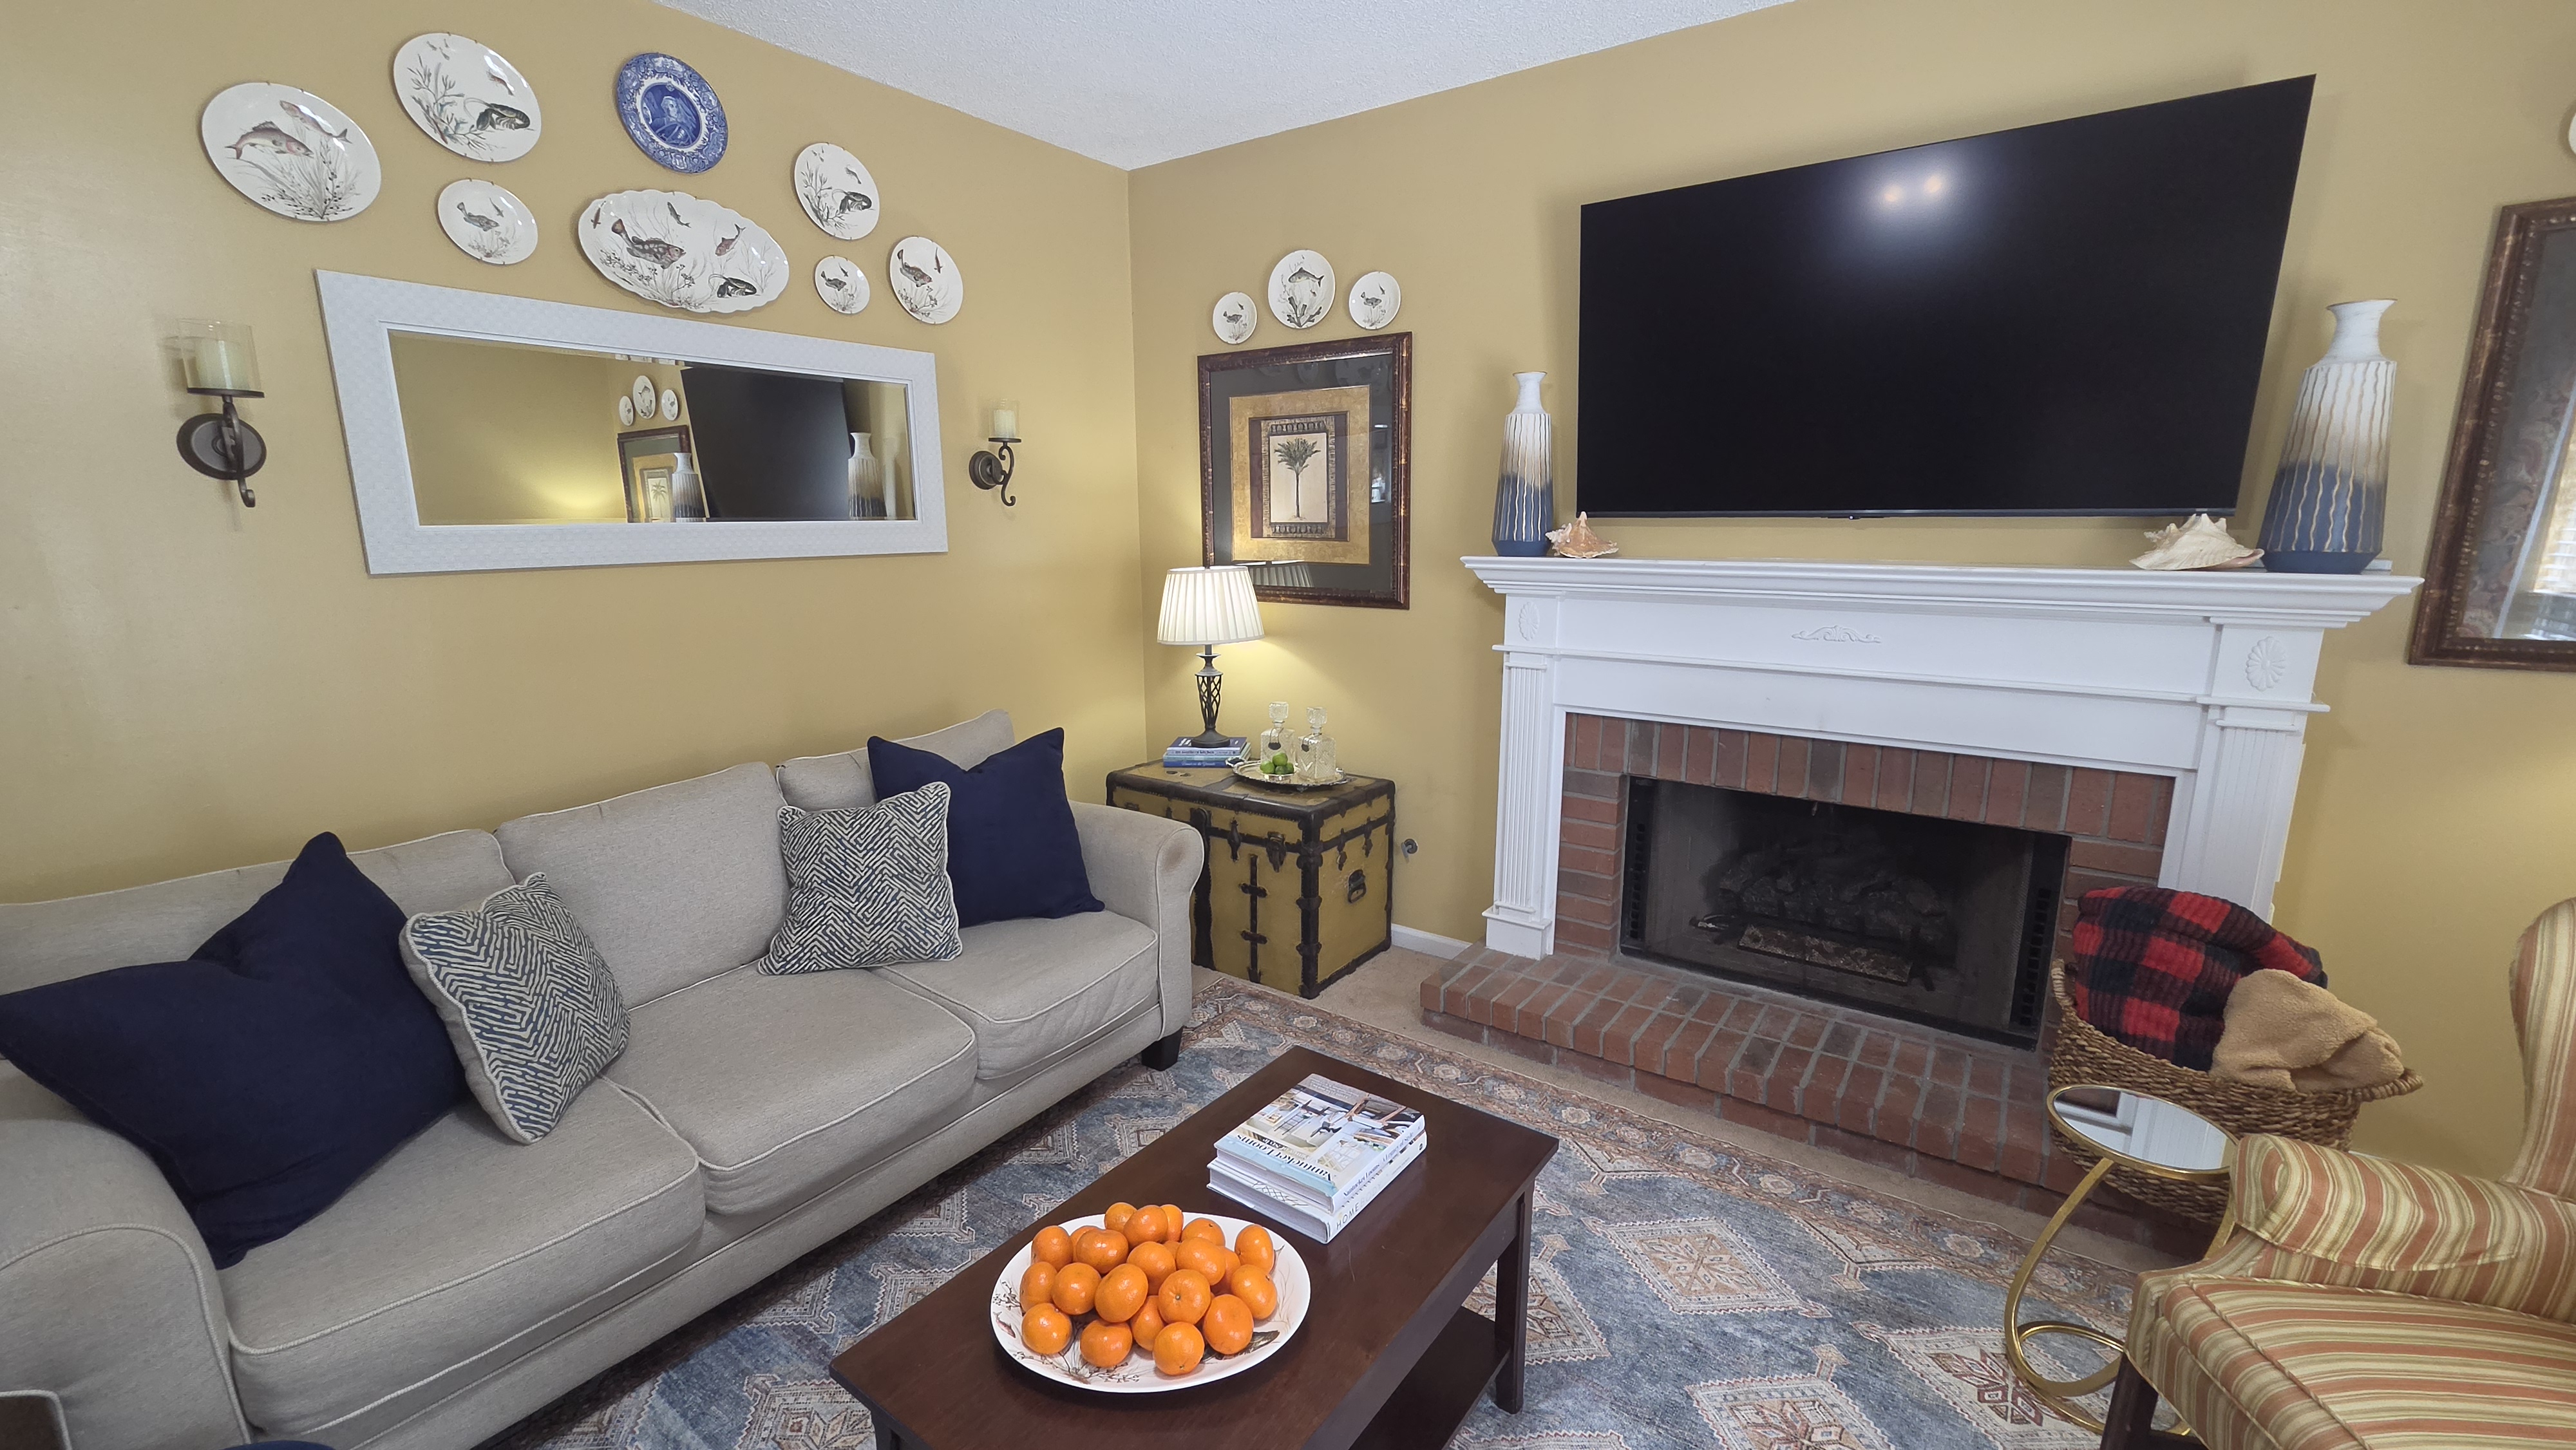
I purchased a large, soft area rug to layer over the carpet which ties all of the coastal colors together and doesn’t compete with the busy and colorful pattern of the curtain panels. The tall gold, blue and white vases on either end of the mantel may be my most favorite find! I paired them with conch shells sourced from the bottom of the ocean in the Bahamas—perfect for this space because they sit low and don’t obstruct the view of the TV.

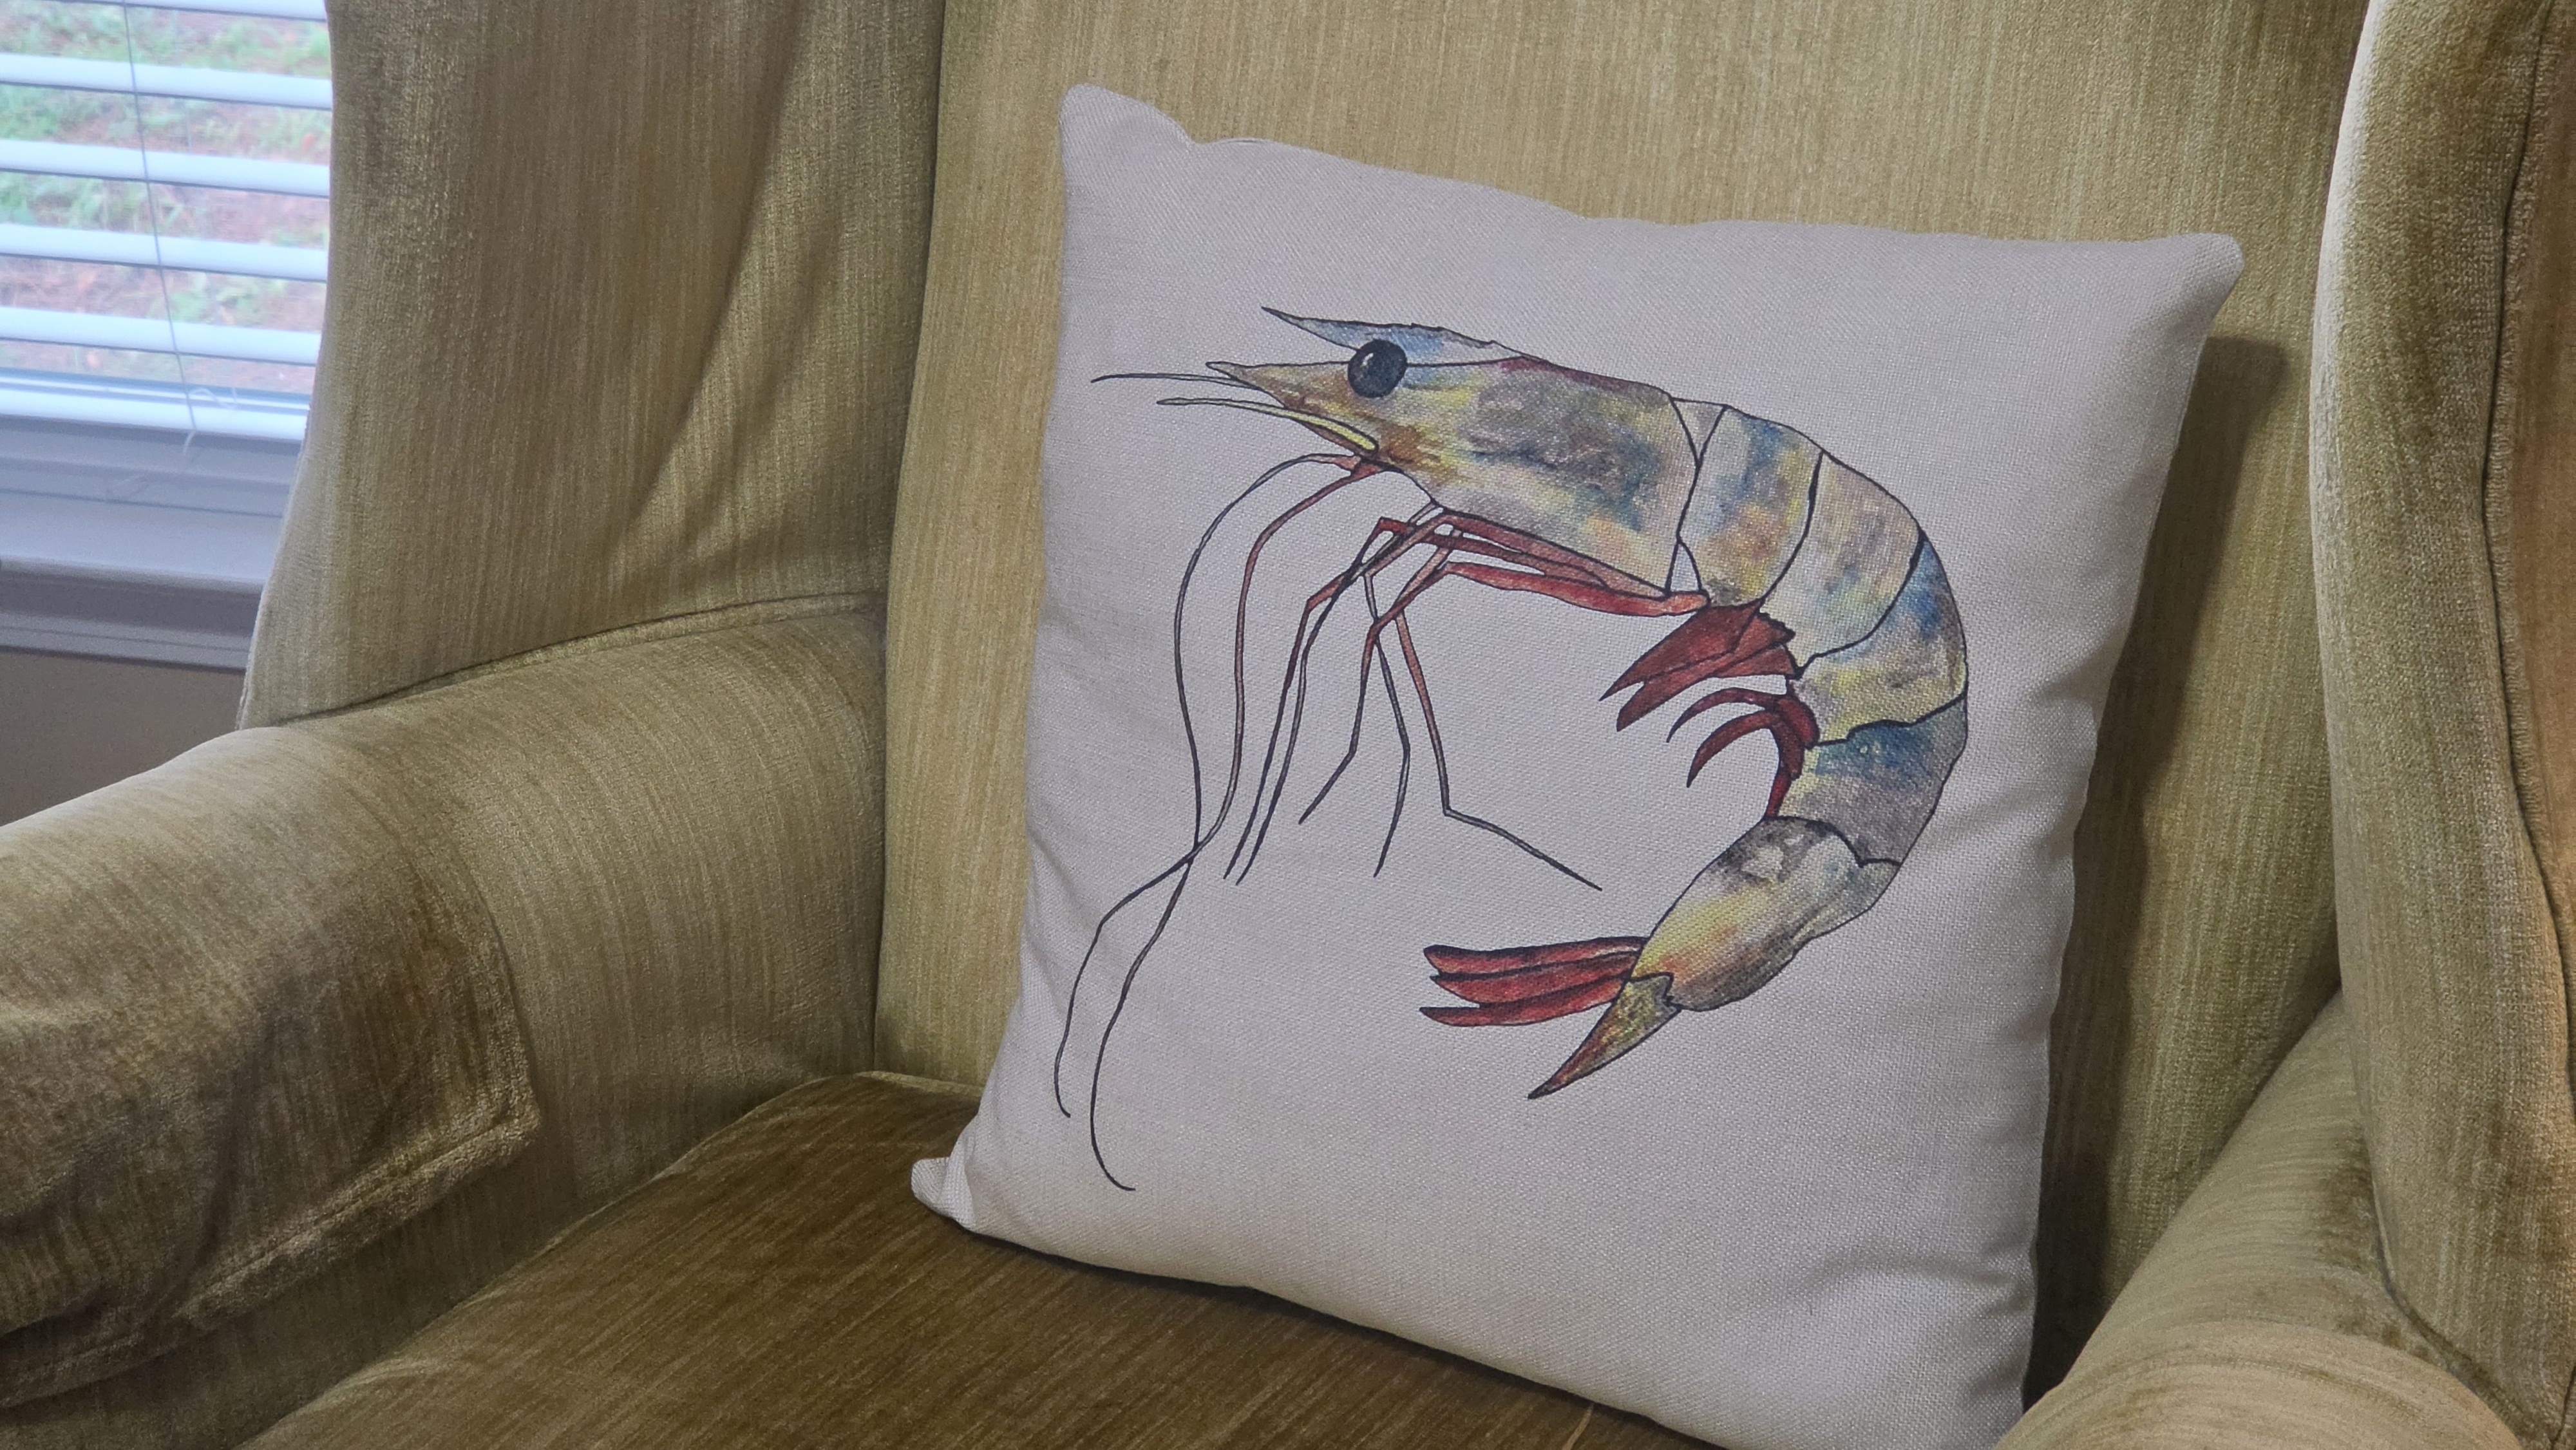
Other updates included replacing the standard 18-inch couch pillows with larger 24-inch designer pillows, which were to scale. The deep navy blue color of the new pillows pulls out the navy blue in the curtain panels and complements the rug. We also replaced the previous lumbar pillows on the wing back chairs with fun wild Georgia shrimp pillows, giving personality to the space and nodding to the chef in the home!

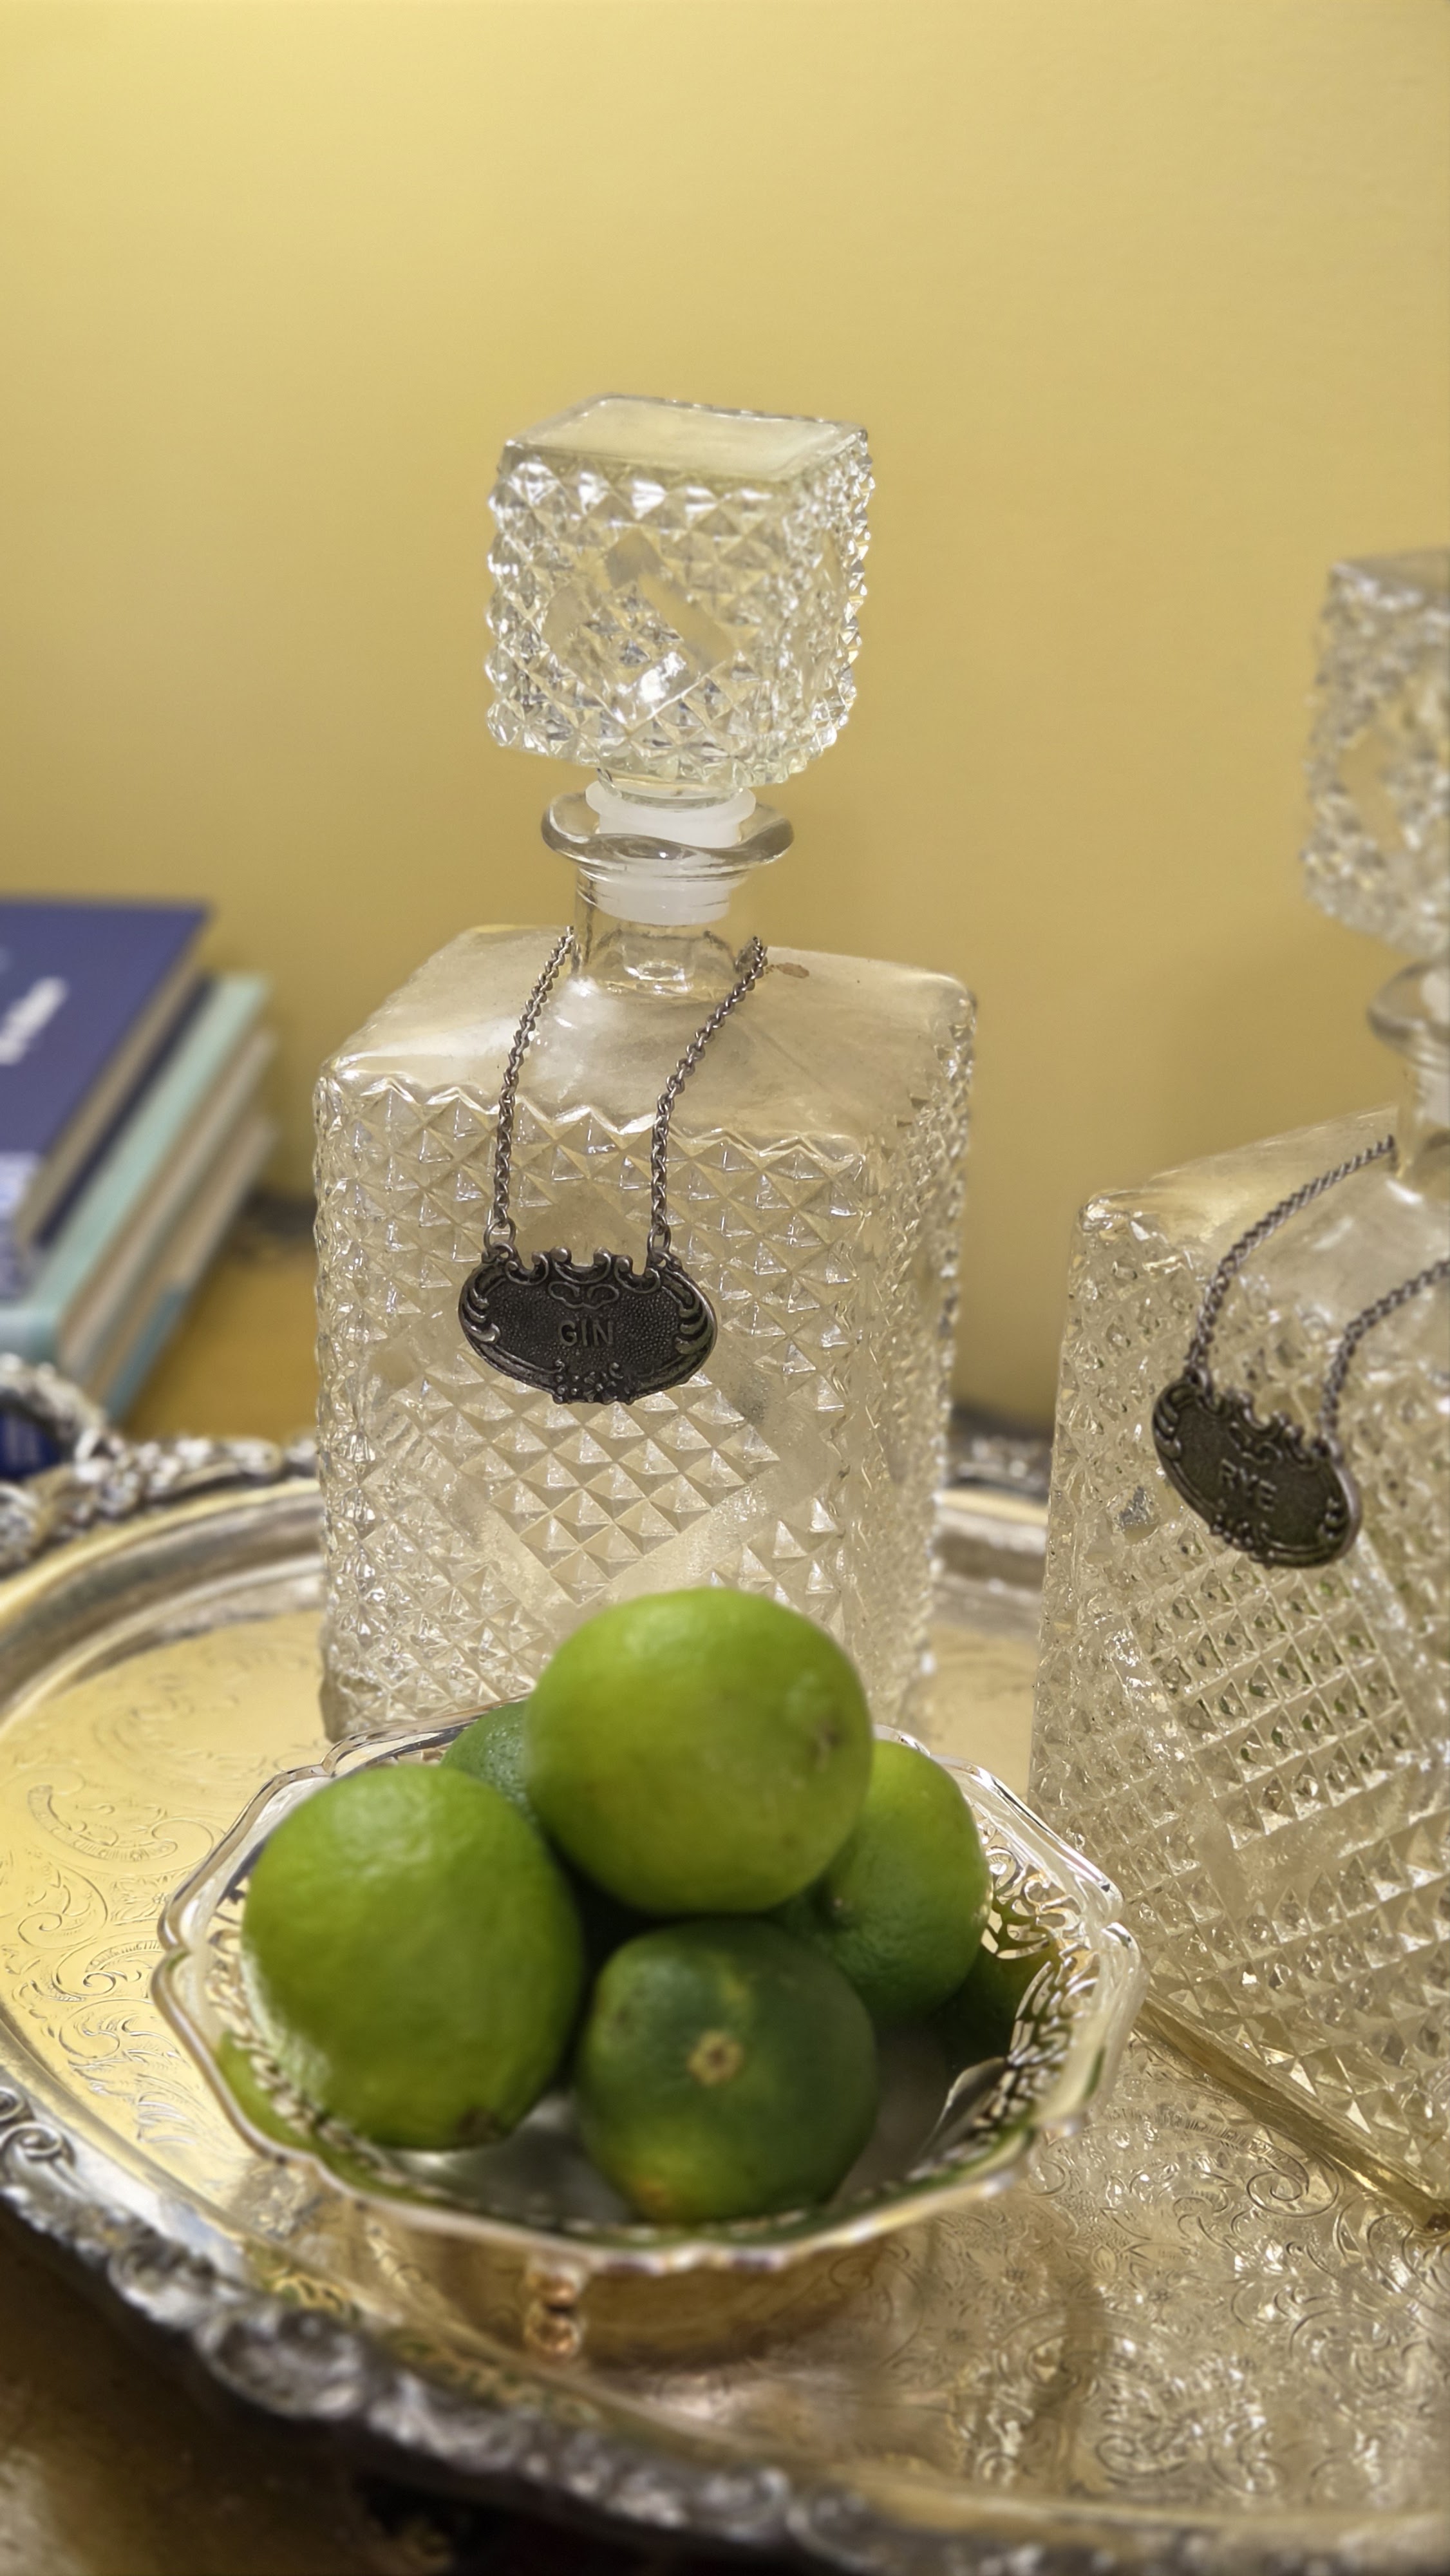
Rather than purchasing console tables for either side of the fireplace, I pulled this antique trunk from one of my guest rooms, which I scored from an estate sale years ago. The trunk mixes old with new, adds storage to the room and acts as a wonderful tabletop for the lamp. I styled it using an antique silver tray and crystal-cut rye and gin decanters from my mother-in-law, complete with fresh green limes. A bright platter of oranges decorates the coffee table alongside a stack of designer books.

Pay close attention to the walls. Before, I had a family collage that was too large for the space on one side of the curtains. I replaced it with a stacked art moment featuring three custom paintings in coordinating frames, acquired during our travels to St. Thomas and Nantucket, along with a favorite art piece from St. Simons Island in the breathtaking Golden Isles of Georgia.

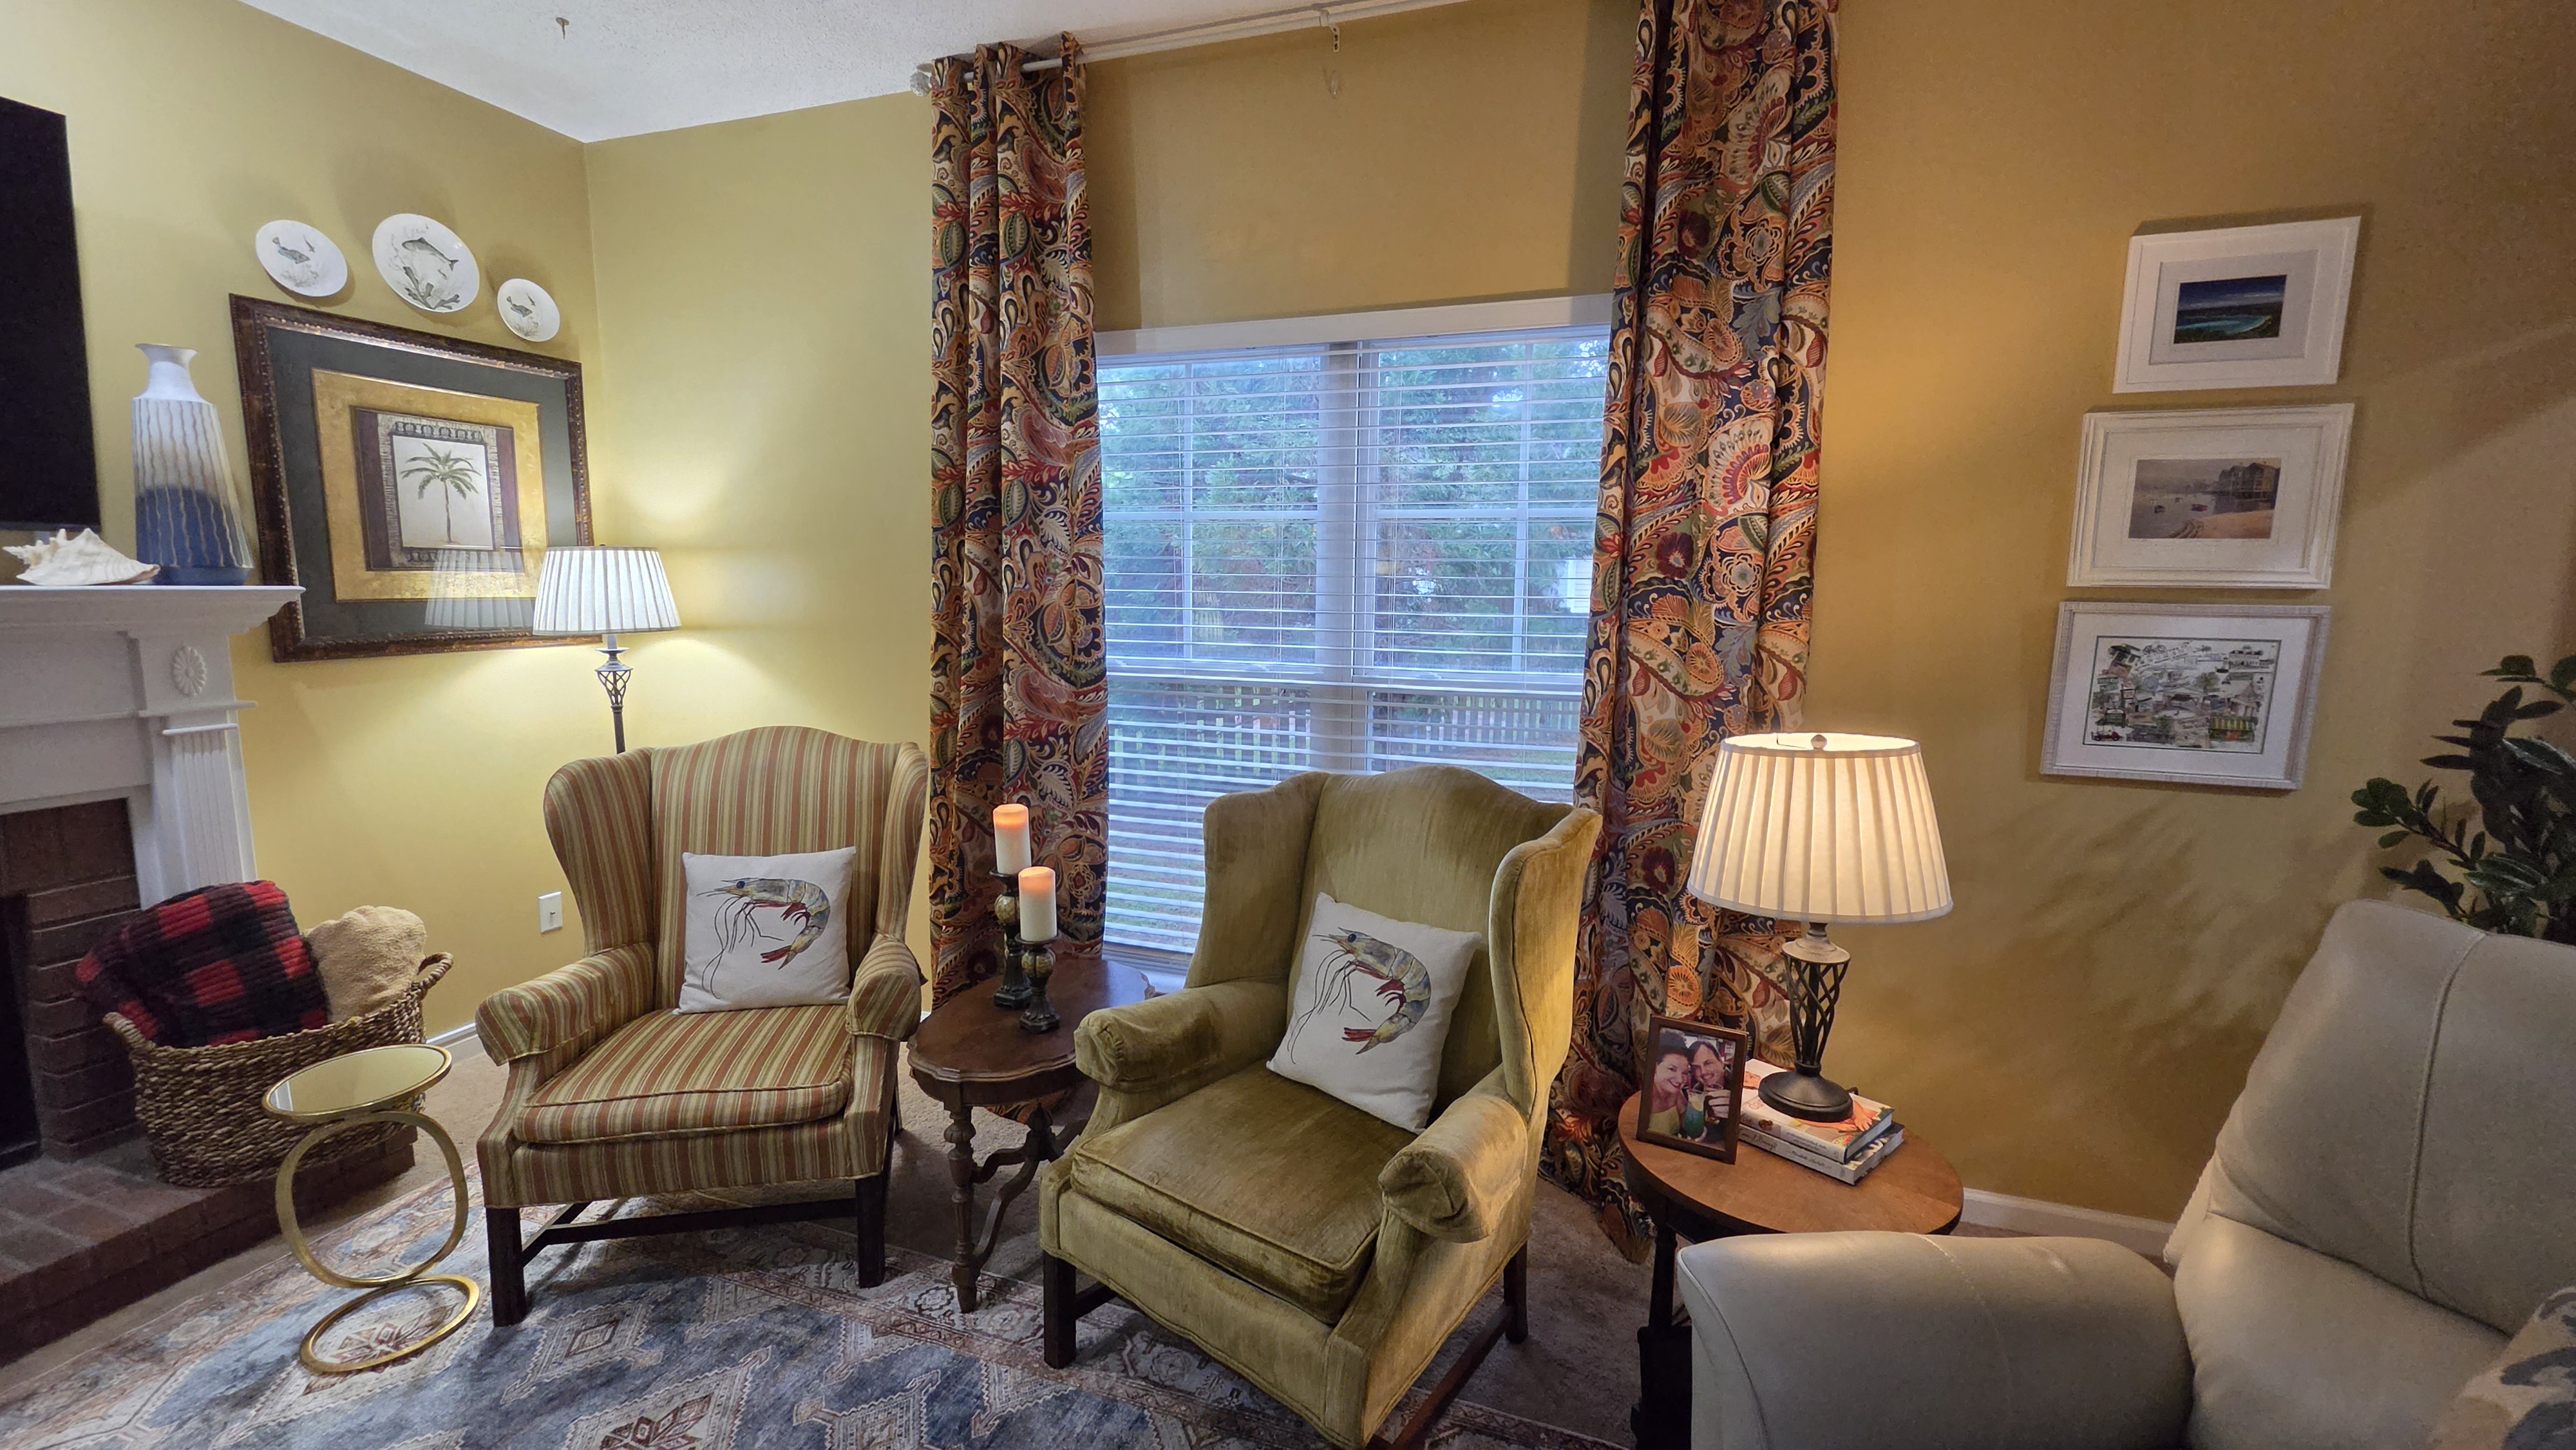
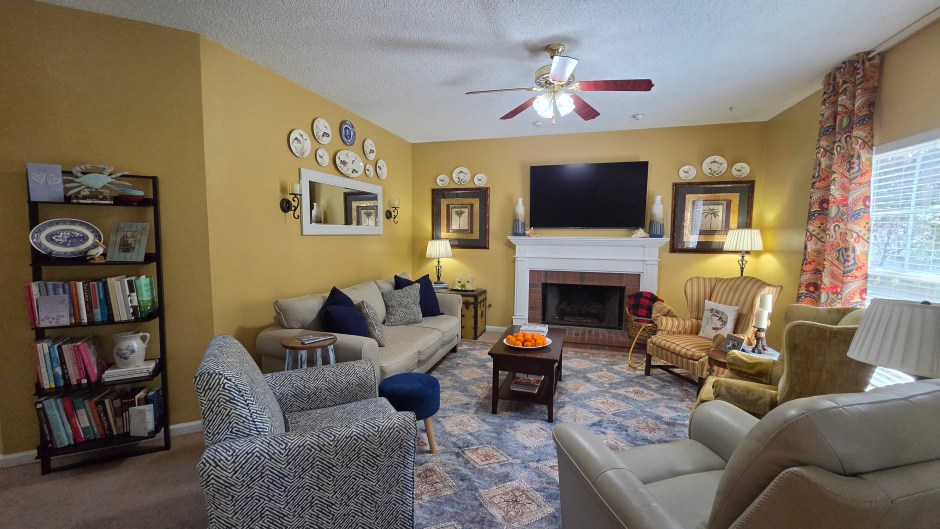
THE FINAL LOOK:

The new and improved living room with ample seating, updated technology and plenty of comfort and personality.

THE TRANSFORMATION AT A GLANCE—SMALL CHANGES, BIG IMPACT:

  • Symmetry & Balance: Anchored the fireplace and mantel with symmetrical decor on both sides to create a visual focal point.
  • Layering & Texture: Added a soft, area rug along with fresh accent pillows to introduce warmth and depth to the seating.
  • Meaningful Wall Art: Framed three special travel pieces and incorporated cherished heirlooms, like family wall sconces, to elevate the artwork.
  • Optimized Layout: Repositioned the furniture to improve traffic flow, open up the room, and create an inviting conversation area.

Peep some of the details up close and see the room at night with the candles and sconces all aglow:
What are your favorite updates? Let me know in the comments!


About the Author

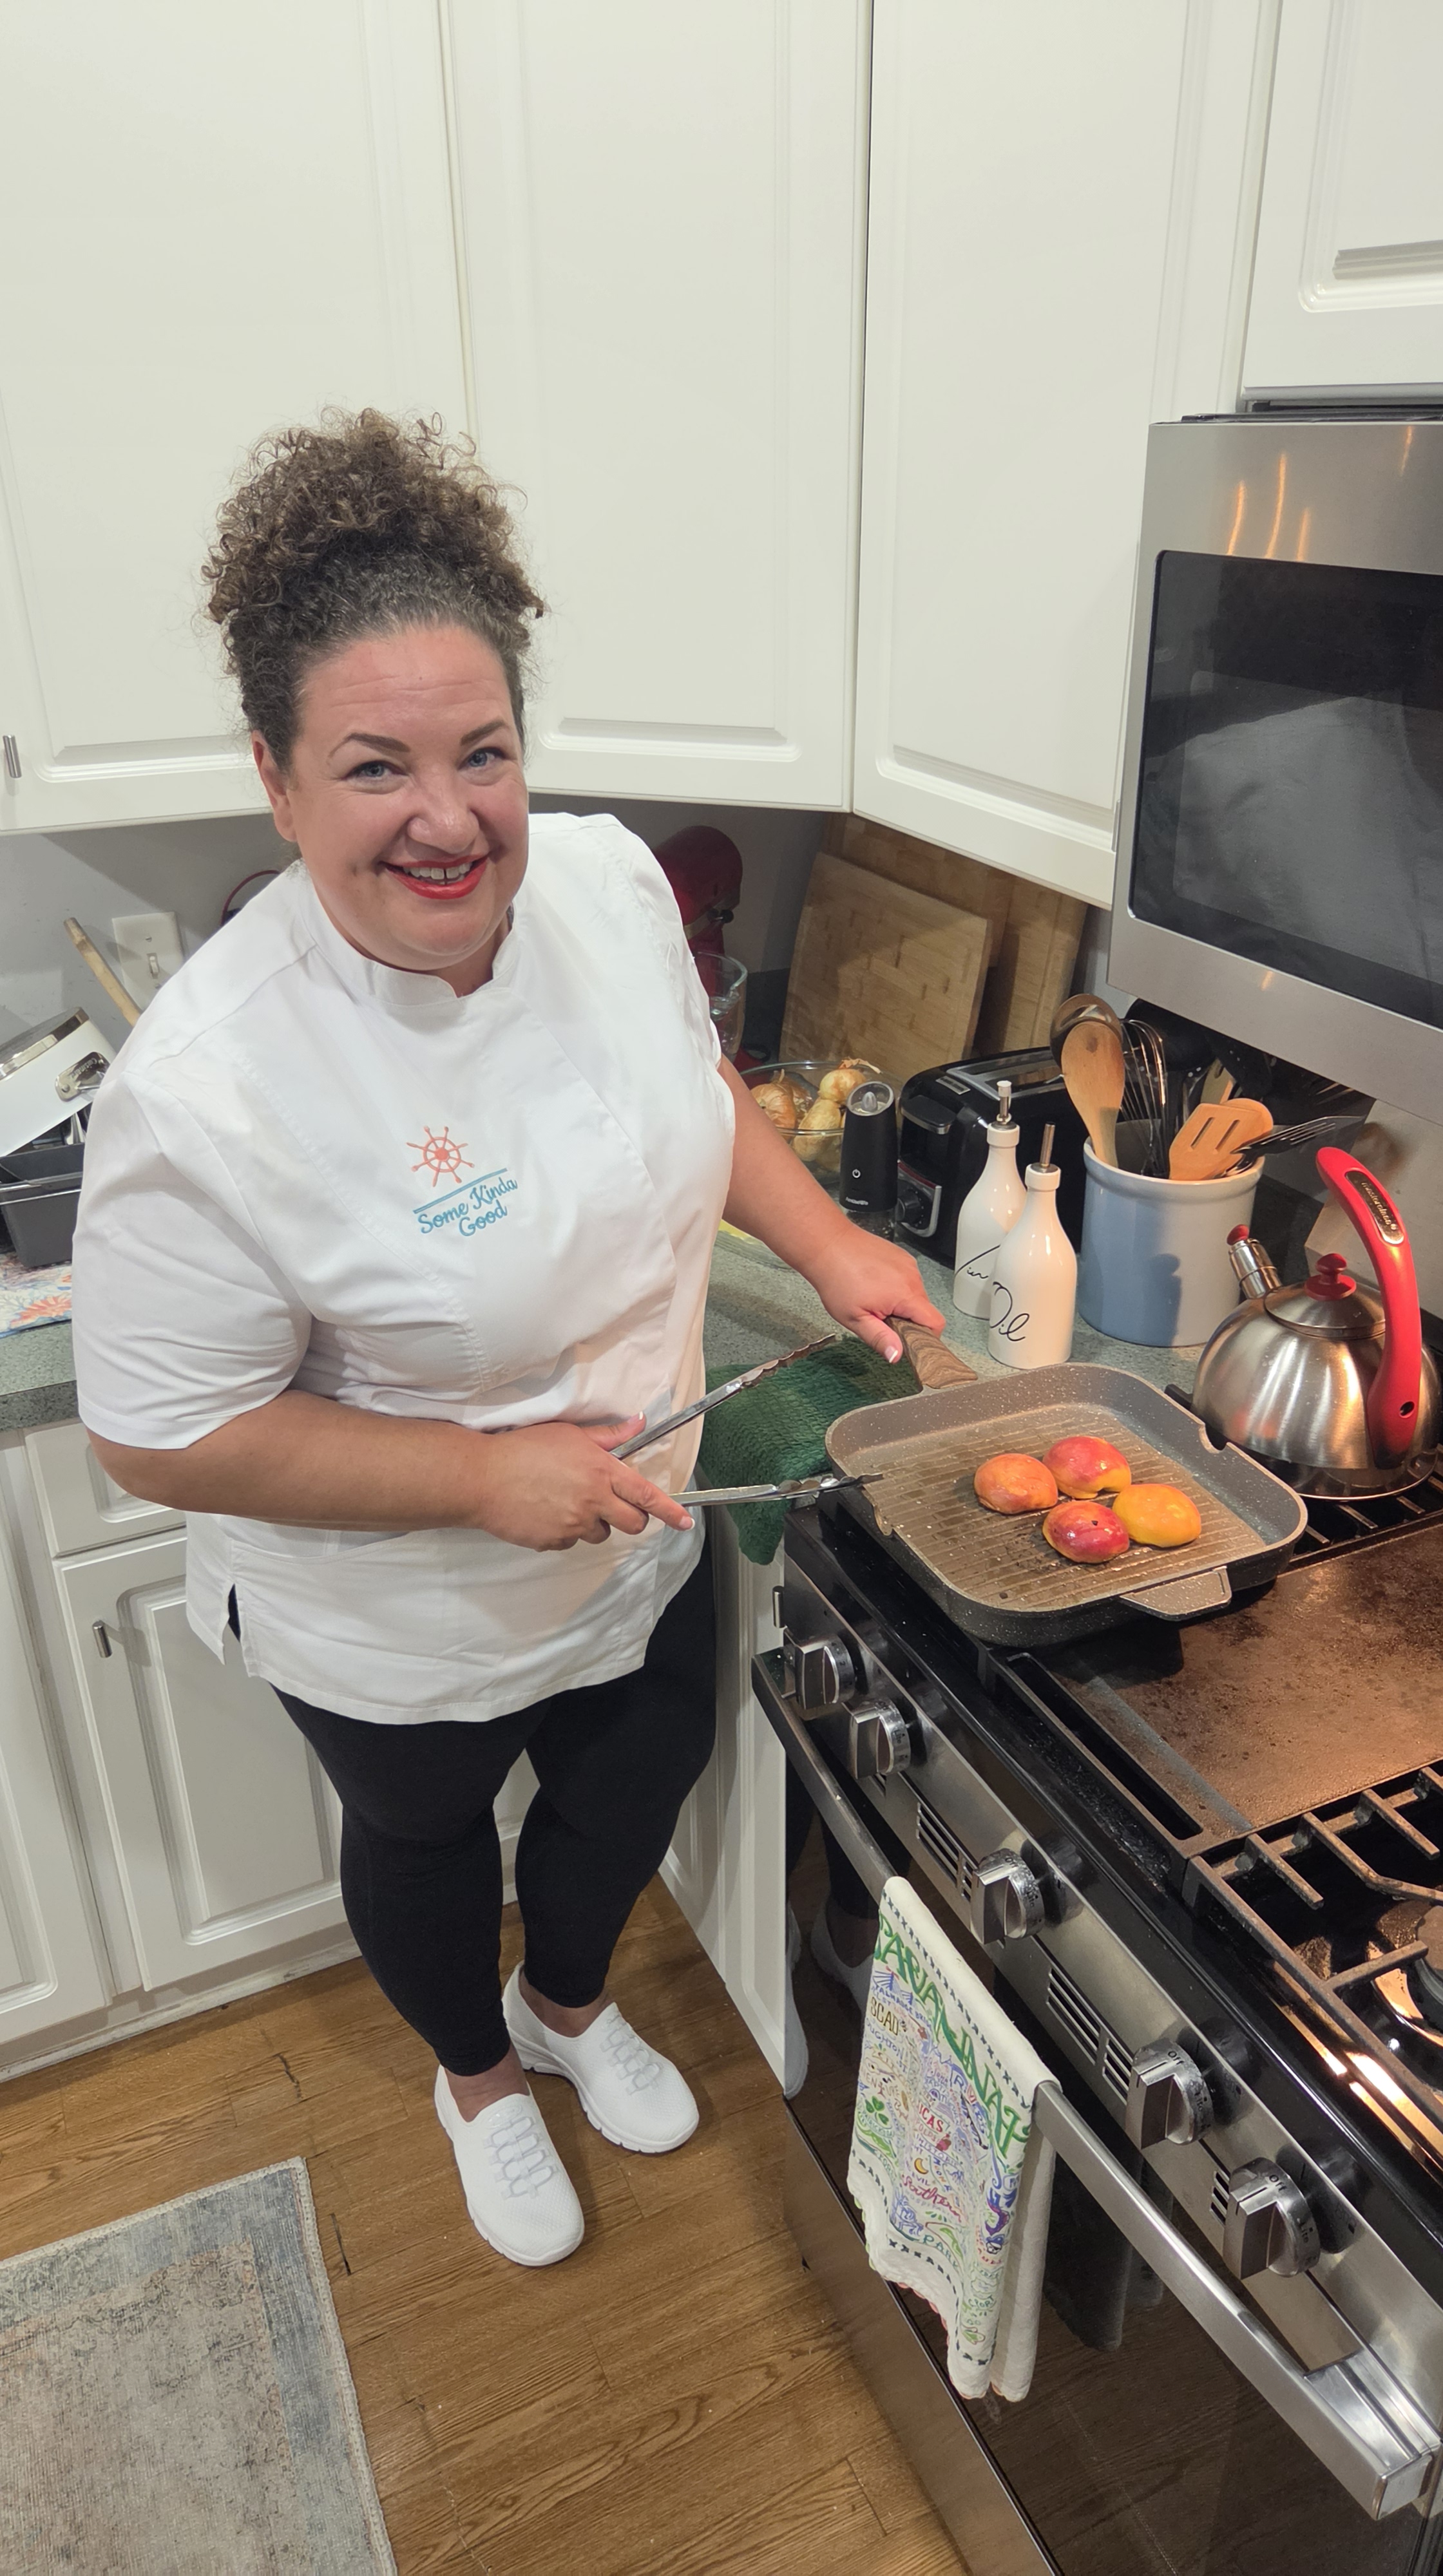
Hungry for more? You’ve come to the right place! Rebekah is a five-star private chef, culinary TV personality, and the two-time bestselling author behind Unique Eats and Eateries of Savannah and Some Kinda Good. Whether she’s appearing on Food Network and ABC or being featured in Forbes, Rebekah’s mission is to share the “Some Kinda Good” life through Southern, coastal-inspired flavors.

A proud Georgia Southern alumna and honors grad of the Savannah Culinary Institute, she’s been dishing out recipes and food news on her award-winning blog since 2011. When she isn’t in the kitchen, she’s likely on the boat with her husband Kurt, scouting the best local eats, tending to her backyard garden or decorating.

Let’s Get Cooking:

Crack This: Farm Eggs vs. Store-Bought

I’ve eaten eggs from the grocery store my entire life. I’m sure at some point in my childhood I’ve tasted an egg fresh from the chicken coop because my Grandpa raised chickens, but that was before my palate was experienced enough to appreciate the difference. It’s true that when you’ve never experienced better, you don’t know what you’re missing.

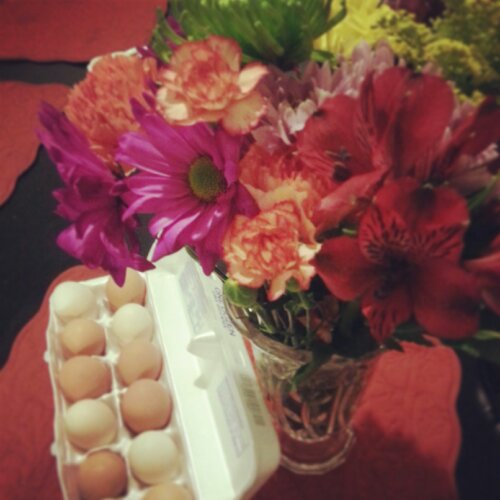
wpid-IMG_20130510_185756.jpgSo, when my good lookin’ boyfriend showed up at my door last week with one dozen, light brown and cream-colored farm eggs in one hand and a beautiful bouquet of flowers in the other (I know…keeper), I set my sights on cooking the eggs just the way a farmer recommended: in a little bacon grease with salt and pepper. I’ve never tasted anything like these eggs…it was pure eggstacy (had to do it!). Seriously, the flavor is out of this world, and sure to make you crack a smile (okay, okay). During cooking I found them to be more fluffy than a store-bought egg. Produced by free-range chickens, farm eggs are more nutritious because the chickens are able to roam freely and eat a natural diet. They contain no added hormones or fillers and are not processed. 

wpid-20130520_195459.jpg

wpid-20130520_195545.jpgOne meal that exemplifies comfort food for me and really lets the farm egg shine, is the tried and true bacon, egg and cheese sandwich. A fancy meal has its time and place, but it’s not always the five-star, fine dining plates that trip my trigger. Sometimes, a good ol’ familiar meal is the only thing I need to feel centered, satisfied and one with my kitchen again. Served with a side of cheese grits, breakfast for dinner has never been better.

Here’s how I make the classic McDonald’s biscuit-turned-sandwich at home:

  • Thick cut, hickory smoked bacon
  • Nature’s Own Honey Wheat Bread
  • 2 Farm Fresh Chicken Eggs
  • Blackberry Jelly (I used homemade jelly from the Amish country that I got from a quaint market, but Smucker’s works great if you don’t have that).
  • Kraft’s Sharp Cheddar Cheese, sliced

Cook three strips of bacon in a skillet on medium heat until just crispy (I like mine slightly underdone). Remove from the pan and drain on paper towels. Pour off some of the grease, reserving enough to cook the eggs, about 1-2 tablespoons. Whisk the eggs together in a small bowl, season with salt & pepper. Pour the eggs into the pan and let set. Cook for about 2 -3 minutes on each side, flipping once for even browning. Meanwhile, slice or grate the cheddar cheese and toast two slices of bread. Spread toasted bread with blackberry jelly, then build the sandwich. Serve with a side of cheese grits for optimum enjoyment!

wpid-20130520_194926.jpgAnd remember, when building the sandwich, it’s all about good architecture! Somehow, the sandwich tastes better when cut into a triangle shape too. At least, that’s the way mama always sent me to school, with a neatly packed cut-in-half sandwich in my brown paper sack.

Have you ever tasted a farm egg? If so, how would you describe the difference?

An Autumn-Inspired Pork Chop Package

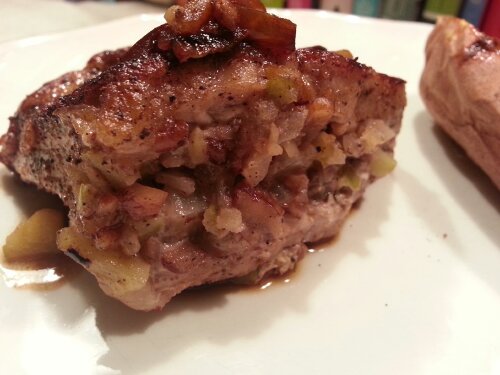
wpid-20121023_203126.jpgAt the start of each new season, there are a few dishes I anticipate cooking greatly. My Apple-Pecan Honey Stuffed Pork Chops in White Wine are at the top of the list in the fall. Apples, onions, pecans and nutmeg exemplify autumn in this comforting, home-cooked meal. It starts on the stove top and finishes in the oven. Special enough for company and simple enough for a weeknight, these tender, juicy pork chops put chicken and beef to shame. It ought to be a crime to eat this good!

Let’s get cookin’! Here’s what you’ll need:

  • 3-4 thick cut pork chops
  • Salt, pepper and nutmeg seasonings
  • 1-2 Tbs honey
  • 1 medium granny smith apple
  • 1 small Vidalia onion
  • 1/2 cup pecans
  • Unsalted butter
  • White wine of your choice, I used Pinot Grigio

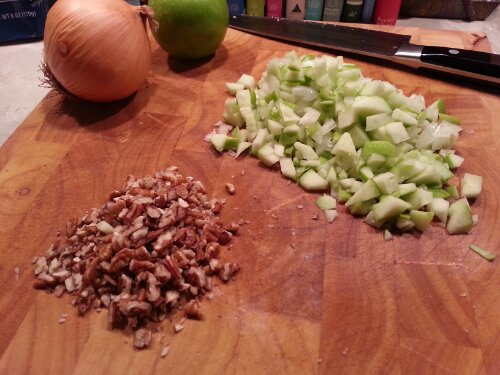
Pre-heat your oven to 350 degrees. Start by dicing a granny smith apple, an onion and your pecans. Be sure to dice them up small, keeping them the same size for even cooking. A smaller dice will also make your pork chops easier to stuff.

Melt a tablespoon of unsalted butter in a large skillet over medium-high heat. Add in the diced apples, onions and pecans, season with salt and pepper and dot with butter. Cook for a few minutes, then drizzle in some honey for a touch of sweetness.

Meanwhile, prepare your pork chops. Season both sides with salt, pepper and a little nutmeg. Rub it in good.

It’s really important to get a thick cut pork chop for this recipe. They should be at least a 1/4 of an inch thick.

You’ll need a small, sharp pairing knife to make the incision. Cut them right down the middle, keeping the back and sides of the pork chop intact but making a large enough incision to create a good size pocket. Don’t be scared. Own it!

By this time, your stuffing will be ready. With a large serving spoon, fill each pork chop to the brim. Pack the stuffing in there, getting down in the crevices. Don’t overfill them, but make sure each one is plump. If you put too much stuffing in the pork chops, it’ll just fall out during cooking. You want them to hold as much as possible. Just remember, deep pockets do the trick. You can use toothpicks to secure them, but I find they just get in the way.

In the same pan (easier clean up and building flavors – winning), melt another tablespoon or two of unsalted butter. Gently lay your stuffed pork chops in the pan and brown on each side for 3-4 minutes until the outsides are golden brown and caramelized. When you flip them, handle with care. You will lose a little stuffing, but don’t fret. Before transferring to the oven, hit the pan with a good splash of white wine and inhale. 😉

Finish cooking the pork chops in a 350 degree oven for 15 minutes. I find it much easier to finish a thick cut of meat in the oven than on the stove top. The meat cooks evenly and you don’t have to worry about one side getting darker than the other or constant flipping. Plus, you’re not standing over the stove and you can take a moment to sip some wine or devote your attention to side dishes.

They taste phenomenal–warm flavors of nutmeg and pork compliment tart apples in every sweet and savory bite. Don’t forget to drizzle the chops with the pan juices. Having one of these on your plate is like having your own little gift. You’re also getting fruit, protein and vegetables all in one little package. What’s not to love?

A sweet potato or brown rice are a pork chop’s friend.

Feel free to change-up the stuffing. Rosemary is awesome with pork. Don’t like pecans? Use walnuts. Even if pork is not in your diet, chicken is always an alternative. The idea is to have fun and experiment with flavors. Enjoy!

What are your favorite fall meals?

Related Content:
Skillet Barbecued Pork Chops Good Enough for Company